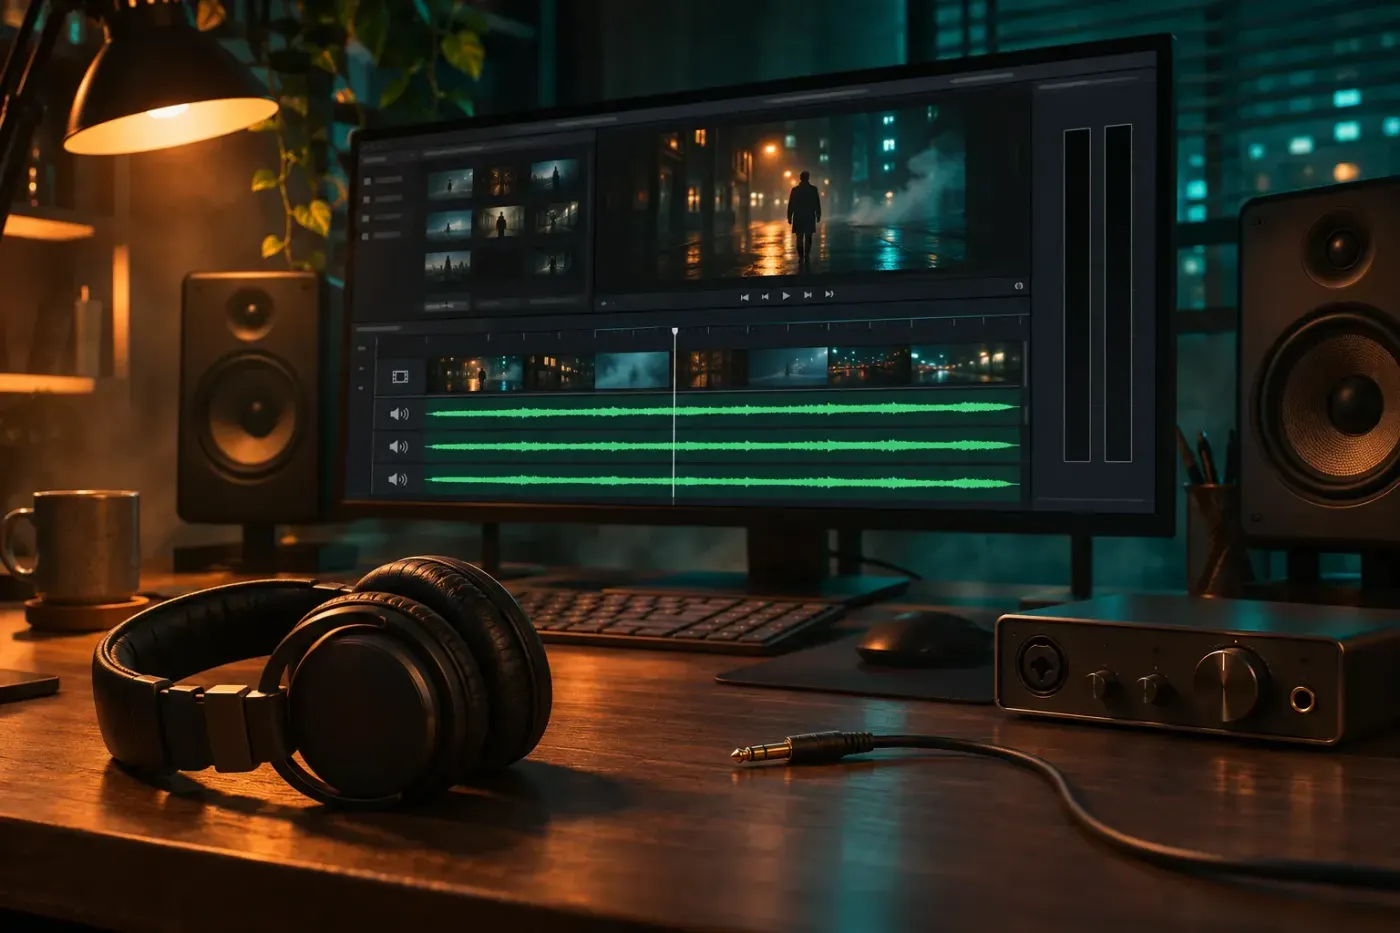
Add music in Premiere Pro and balance it under dialogue
Import a licensed song onto its own track, fit it to the picture and lower it under speech with fades, clip keyframes or Ducking. Check the whole mix before delivery.
Import a licensed music file with File > Import (Ctrl + I on Windows, Command + I on macOS), then drag it from the Project panel onto an audio track below the dialogue. Trim the ending to the picture, add fades at the clip edges, and lower the music under speech with volume keyframes or Essential Sound's Ducking controls.
I'd place the music once the main picture timing has settled: a later cut can leave a fade or a volume dip against the wrong words. For the steps below, the track stack is V1 picture, A1 dialogue, A2 music. Give a separate voiceover its own audio track so you can balance it without changing the interview. These are default shortcuts; custom mappings can differ.
Import the song and give it a separate track
- Choose File > Import, select the music file and confirm. The default shortcut is Ctrl + I on Windows or Command + I on macOS; Adobe's shortcut list also gives Shift + 1 for the Project panel and Shift + 2 for the Source Monitor on both systems.
- Double-click the imported song to open it in the Source Monitor and listen with the Spacebar. If you need only part of it, mark an In point with I and an Out point with O.
- Move the sequence playhead to the music's starting point, then drag the clip from the Project panel or Source Monitor to the Timeline. Drop it on an empty audio track below the dialogue, A2 in this example.
Premiere supports WAV, AIFF, MP3, M4A, AAC and BWF audio. Check that the song plays in the Source Monitor before building fades and dips around it.
If you need another track, activate the Timeline, right-click an audio track header and choose Add Track. In Add Tracks, request one audio track, choose its Placement and Track Type, then confirm the addition. Standard tracks accept both mono and stereo clips, so Standard suits an ordinary music file. The Add Tracks controls also let you place that track where you need it; use its actual track number throughout these steps.
Play across the music's first frame. Its opening note should arrive at the intended moment, and the dialogue clips should stay in place. If a note starts halfway through, move the song's In point earlier and check the placement again.
Choose music you can publish
Use music you own the necessary rights to, or a track licensed for the video's destination. Keep the licence with the project. A streaming subscription doesn't supply that permission: Spotify's terms grant personal, non-commercial access and restrict redistribution.
For Adobe Stock audio, open Window > Workspaces > Audio, then Browse in Essential Sound. You can audition a song against the picture with Timeline sync and drag a preview onto the sequence. That preview is a low-bitrate M4A. When you choose License > Purchase, Premiere replaces the preview instances with licensed, uncompressed WAV audio. Complete the purchase before publishing.
Check the destination and allowed edits in the licence. Adobe Stock's audio terms require an extended licence for film, broadcast, SVOD, apps, games and point of sale. They permit minimal changes such as pitch shifting or time compression, while prohibiting remixes, mashups and changes that make a new song. Keep the licence ID too: Adobe describes using it to dispute a YouTube copyright claim on a licensed track.
YouTube Studio > Audio library is another source of downloadable MP3 music. YouTube's Audio Library instructions distinguish tracks that need Creative Commons attribution in the video description. Check the selected track's terms for any other publishing destination.
Generate Music is a separate option in Premiere (beta). It creates instrumental music and uses generative credits shown by the tool. The desktop import steps above work with a music file you already have permission to use.
Fit the music to the end of the picture
For a straightforward ending, select the music and drag its right edge when the trim icon appears. Line that edge up with the end of the final video clip, then fade out the last phrase.
Remix is useful when the song needs a shorter arrangement that keeps its beginning and ending. Use it only when the music's licence permits that rearrangement. A Stock purchase doesn't give blanket permission to remix the song.
- Select the music clip. In the Toolbar, hold the Ripple Edit tool group and choose Remix Tool.
- Drag the clip's right edge toward the required ending. In Essential Sound > Duration, enter the target duration.
- Adjust Segments and Variations if the arrangement needs work, then listen across every join marked by a vertical zigzag.
Remix preserves the clip's beginning and ending and rearranges its middle. It doesn't analyse lyrics, so listen for words joined from different verses. To keep a particular musical moment against a picture edit, split the song at that point and remix the pieces separately.
The result can need a finishing trim. Adobe puts Remix within five seconds of the target, typically within one second. Check the resulting boundary and give the ending a controlled fade.
Fade both ends
Expand the audio track vertically. With the Timeline active, the default Increase Audio Tracks Height shortcut is Alt + = on Windows or Option + = on macOS; Alt + - or Option + - makes the tracks shorter. Then drag the fade handles inward from the clip's edges: the left handle makes the fade-in, the right handle the fade-out.
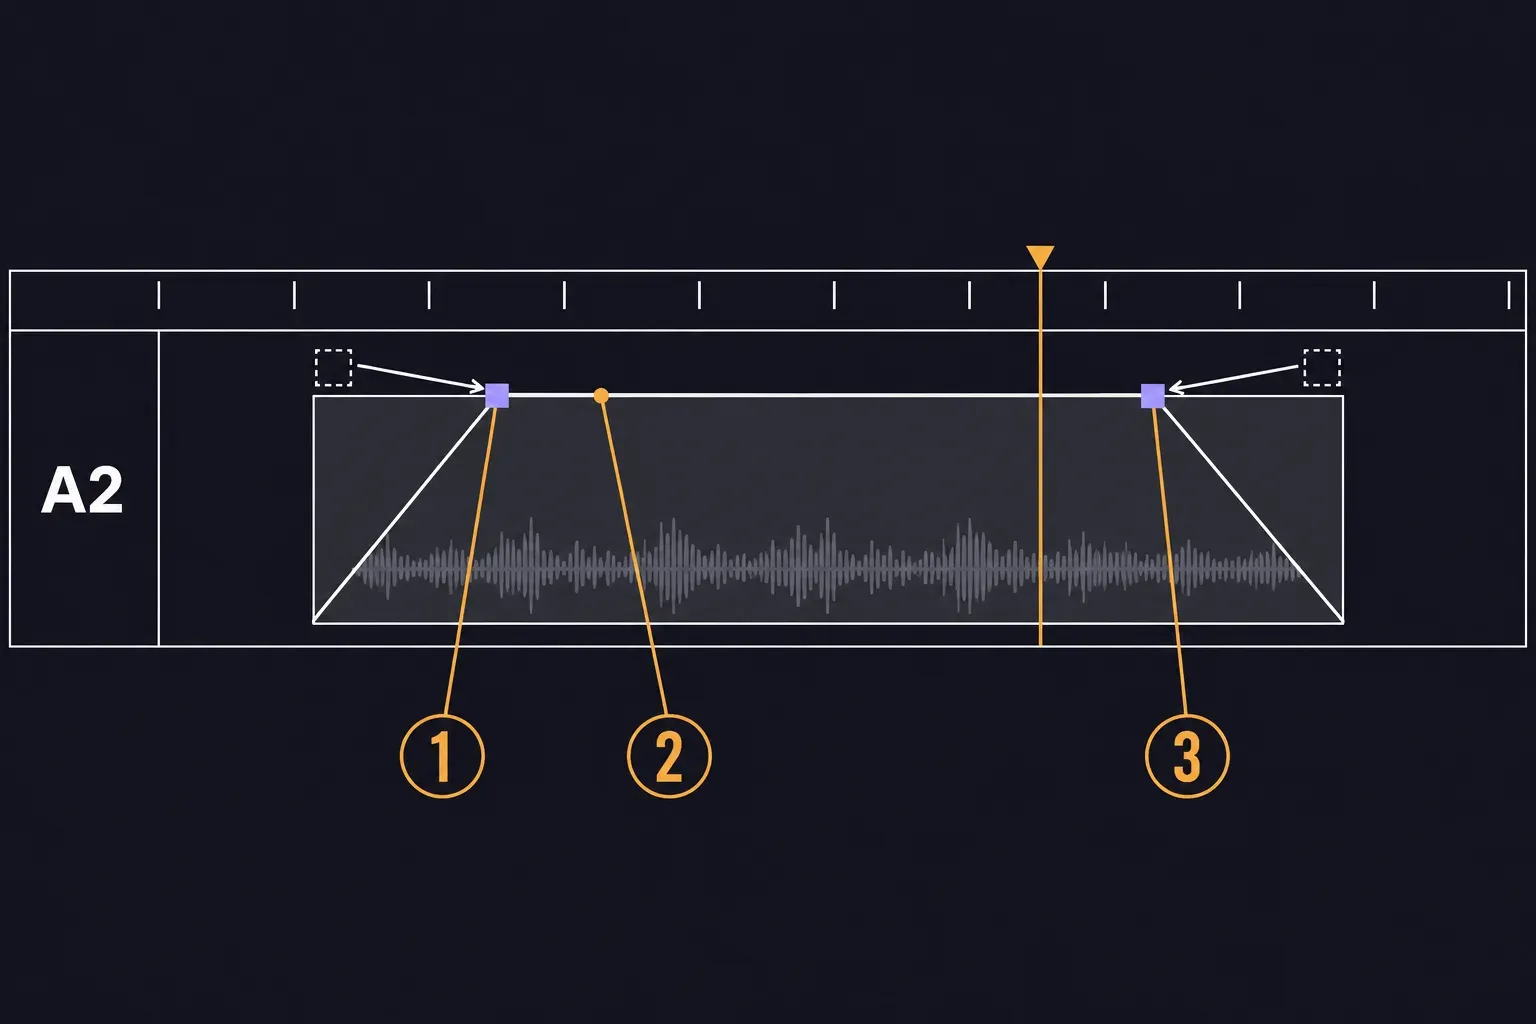
Listen from a few seconds before the ending until after it. The phrase should finish or fade at the planned boundary. If the picture changes later, check that boundary again before changing any speech dips.
Lower the music under dialogue
For a few spoken lines, I'd use hand keyframes because each dip can follow the delivery of the words. For speech through most of the sequence, Ducking creates the dips in one pass, leaving you to refine their timing.
Set a few dips with clip keyframes
- Expand the music track. In its header, choose Show Keyframes > Clip Keyframes to display the clip's volume line. Clip Keyframes control the clip's Volume Level; Track Keyframes affect the whole track.
- Ctrl-click the line on Windows or Command-click it on macOS to add four points around a spoken line: before the dip, just before the first word, just after the last word, and after the recovery.
- Pull the two middle points down until every word stays clear. Play across the first word and last word to check the fall and recovery.
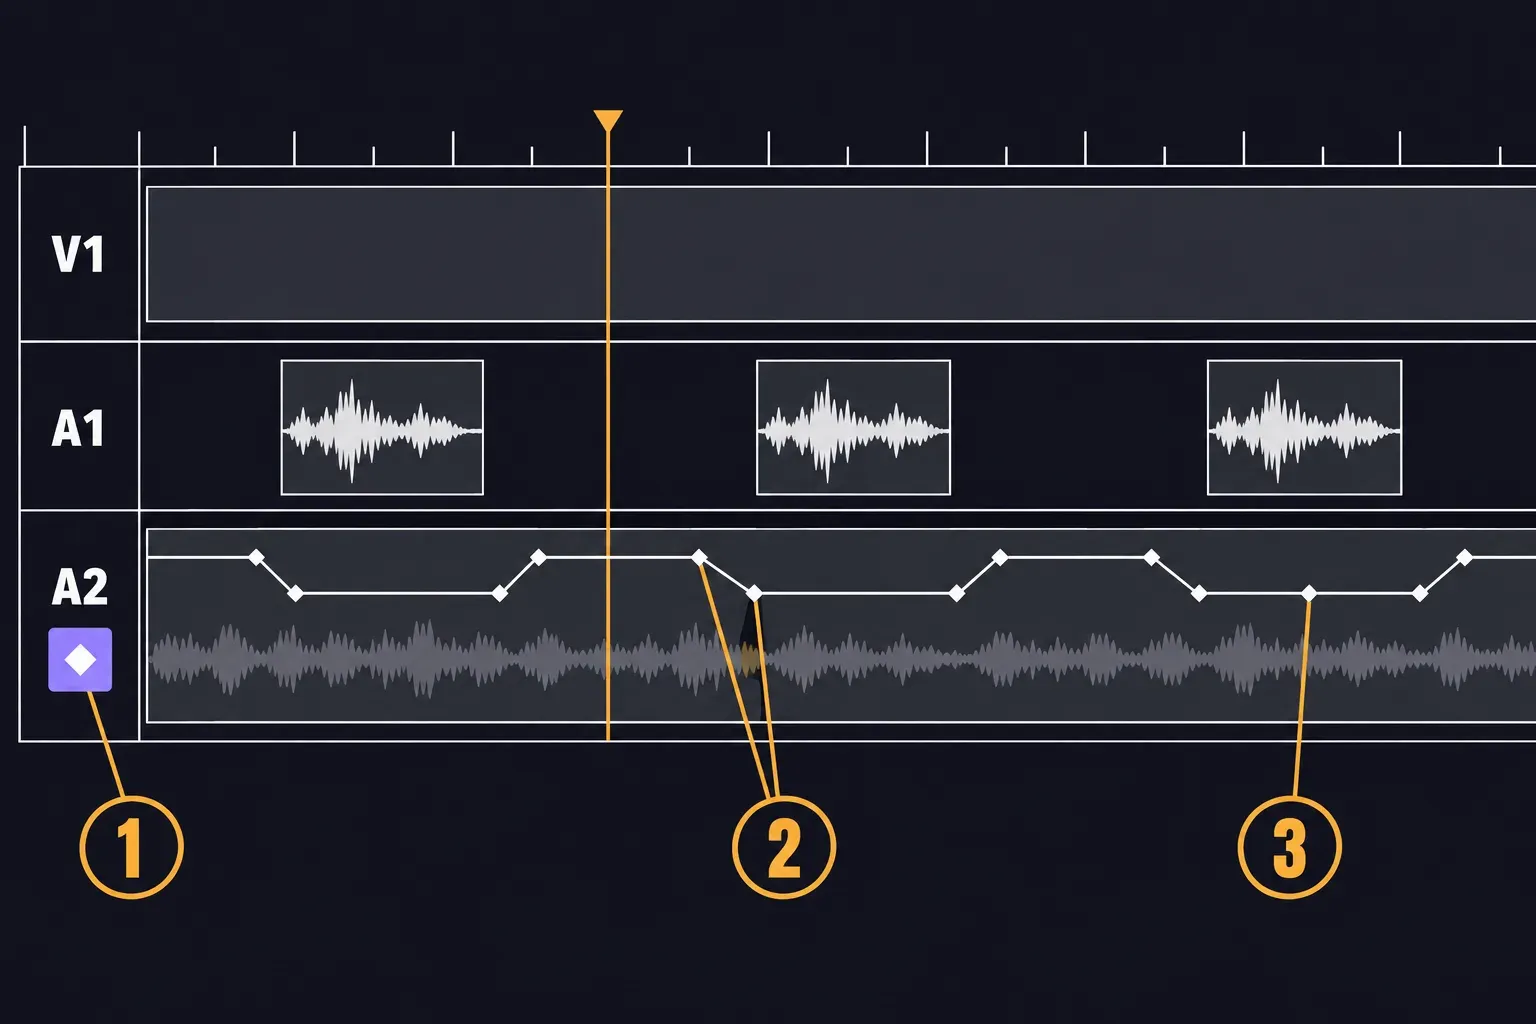
For one level across the selected song, use Volume in Properties. Check the selection first: with several clips selected, entering a value applies it to all of them. After moving or trimming the music, replay each dip against the speech.
Generate dips with Ducking
- Open the Audio workspace through Window > Workspaces > Audio and use its Essential Sound panel.
- Select all spoken clips, including any separate voiceover, and tag them Dialogue. Select the song and tag it Music.
- Enable Ducking on the music and choose Dialogue under Duck Against.
- Set Sensitivity, Duck Amount, Fade Duration and Fade Position, then select Generate Keyframes.
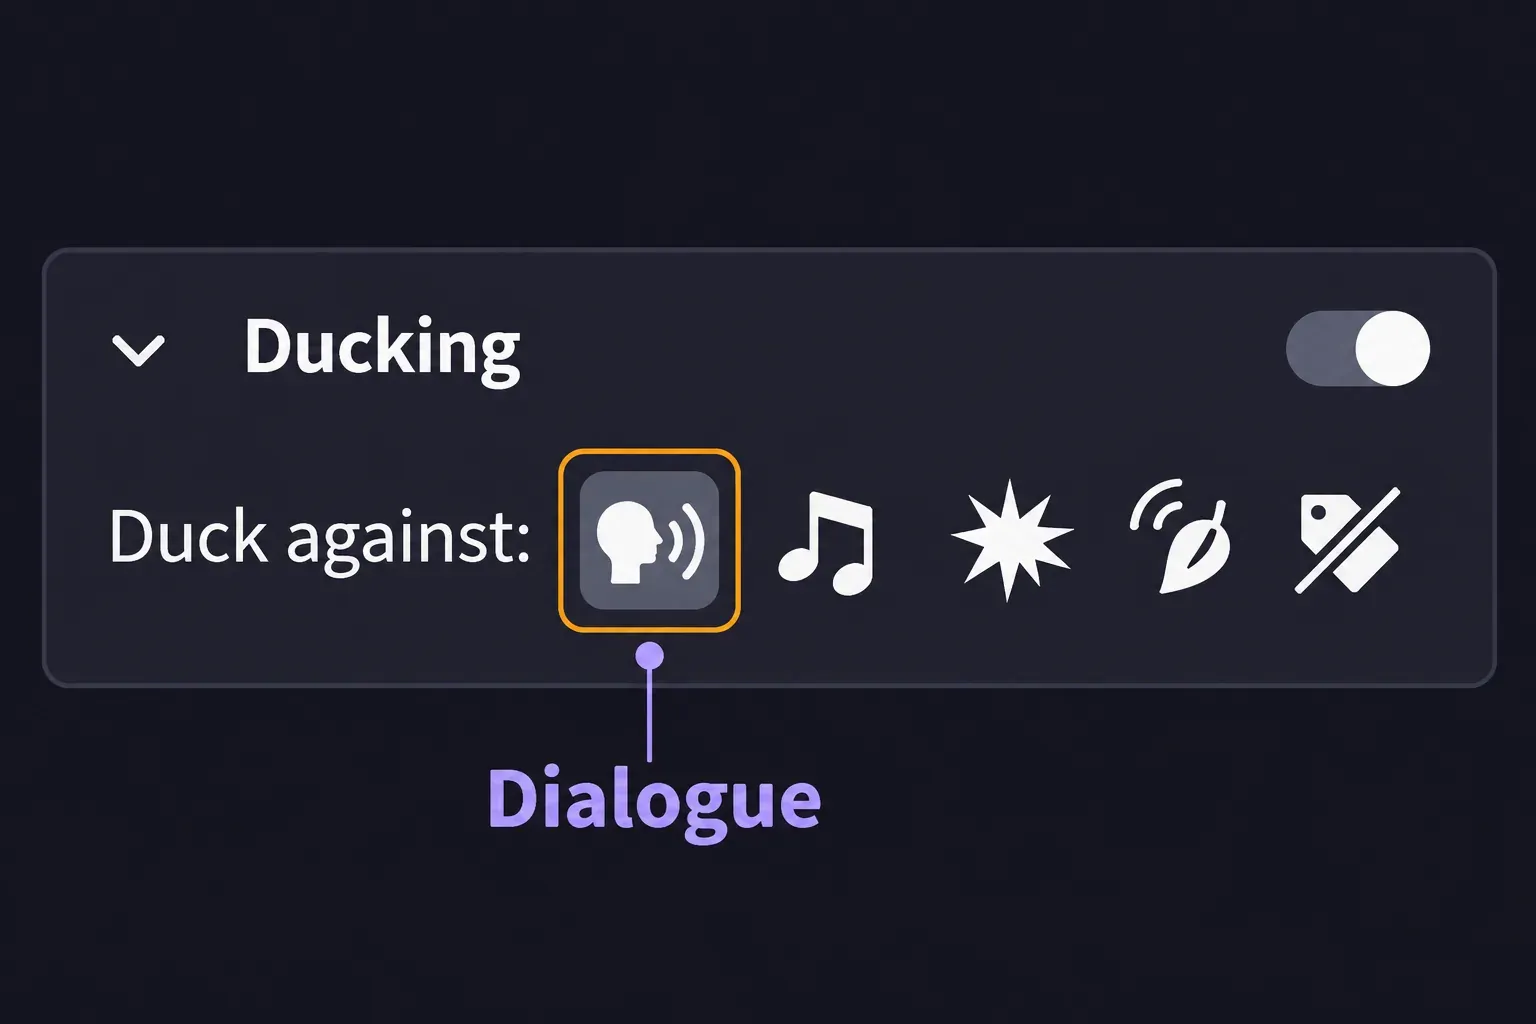
Ducking adds an Amplify effect and generates keyframes on its gain. Start playback before a spoken line and listen through its end. Change Duck Amount if the balance is wrong; use Fade Duration and Fade Position when the music falls or recovers at the wrong moment.
You can edit the generated keyframes by hand, but Generate Keyframes overwrites those hand edits. After a picture re-cut, regenerate first, then make the final hand adjustments.
Check the completed mix
Open Window > Audio Meters and play the combined sequence. Watch for red peaks or levels that drop too low while listening for clear speech. A meter reading on the music alone doesn't tell you whether the combined mix clips.
To adjust the level of the whole music track, use Window > Audio Track Mixer (default Shift + 6 on both systems) and its A2 fader. The Audio Track Mixer controls a complete track, so check every section on A2 after that change.
If delivery comes with a loudness specification, add Special > Loudness Meter from the first effect slot on the Mix track in Audio Track Mixer. Adobe's Loudness Meter steps show that placement. Check the completed programme against the destination's specification; set the music-to-speech balance by listening.
Play the sequence from the start. Every spoken word should stay clear, the music should recover between lines, and the final phrase should finish where the picture does.