Premiere Pro audio not playing: fixes in order
Find whether the silence belongs to a clip, sequence, project or output device, then fix the smallest cause first and leave the cache rebuild until last.
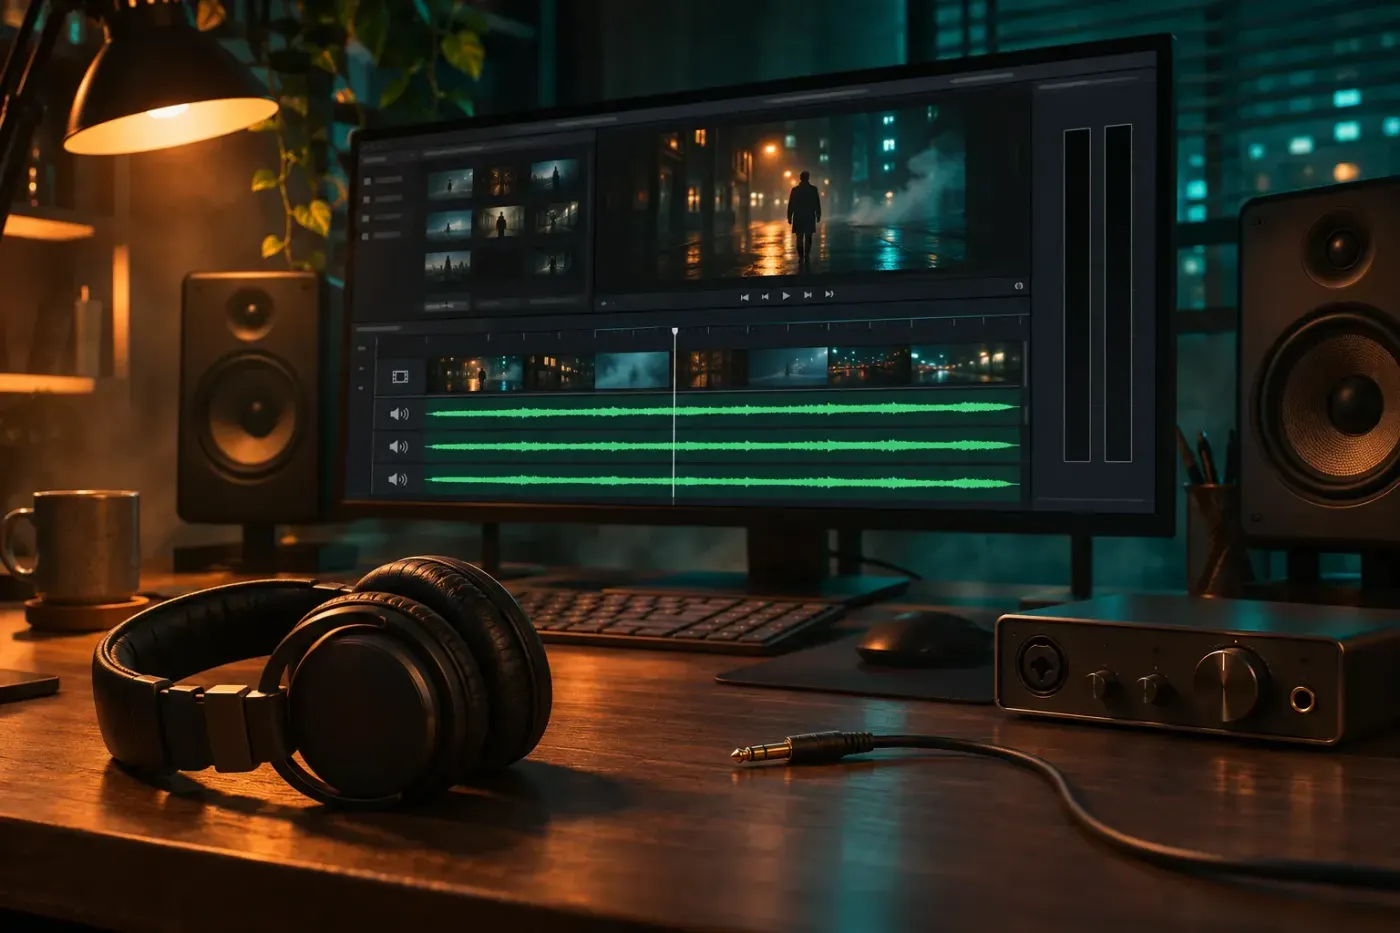
If Adobe Premiere (formerly Premiere Pro) isn't playing audio, first find whether the silence affects one clip, one sequence or everything you open. A clip that plays in the Source Monitor points you toward the sequence's mute, Solo and level controls; silence across known-good material points toward the output device. Fix the smallest area that fails, change one setting at a time and listen again. The media cache rebuild comes last.
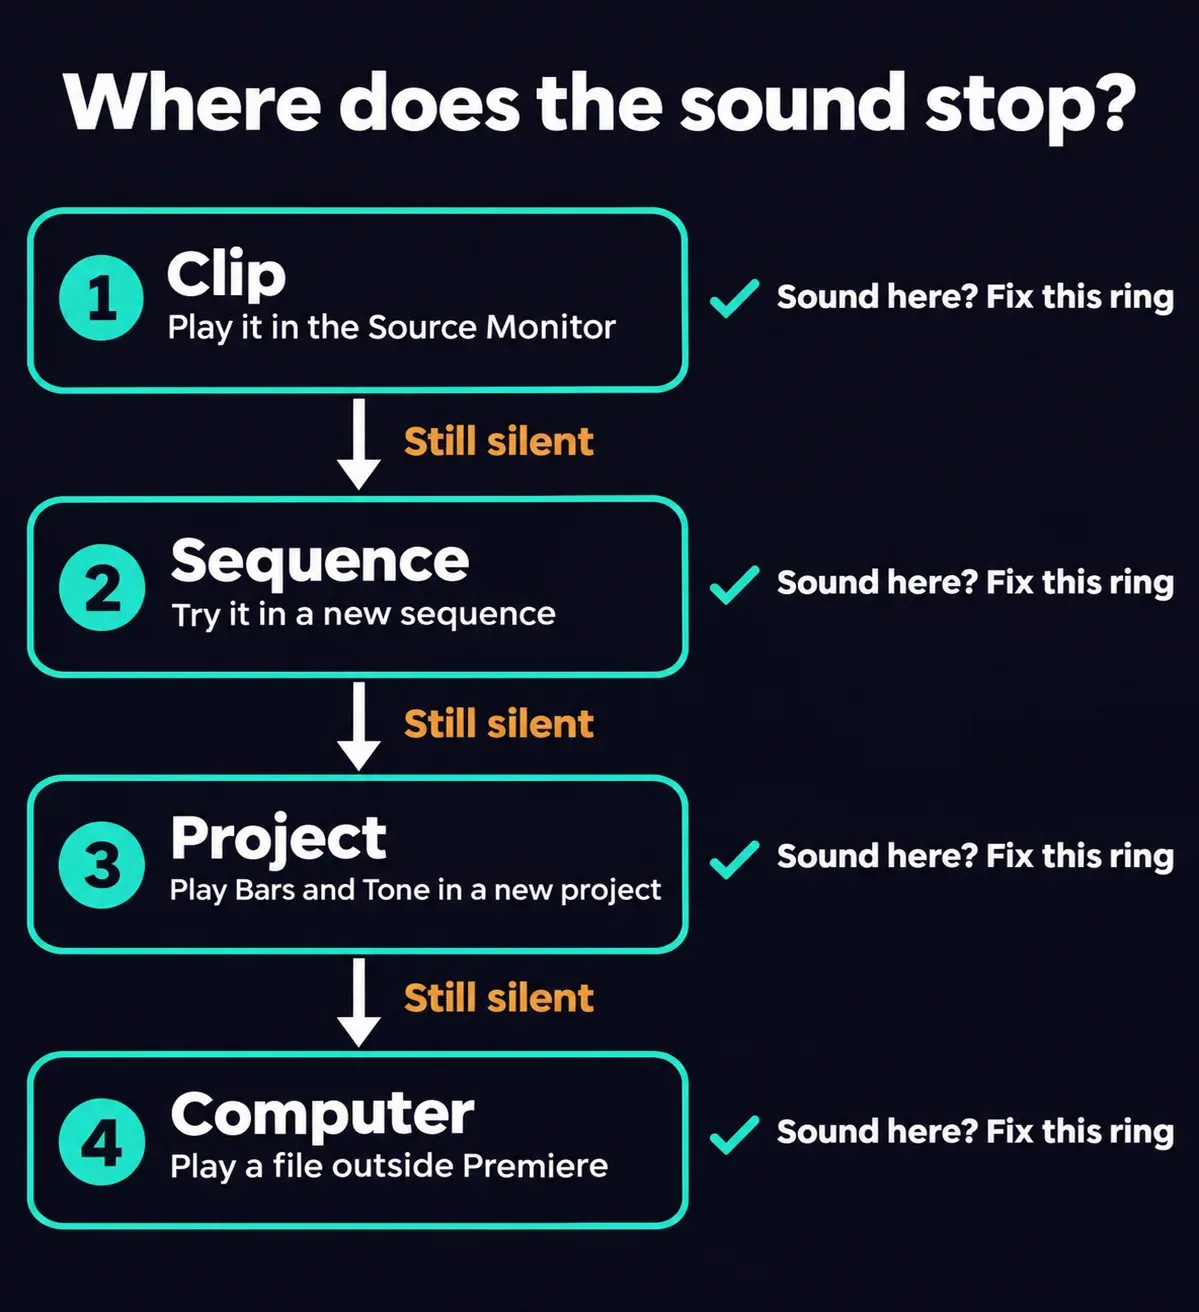
Find the ring where the sound stops
Read the timeline top to bottom before you change anything. In a simple interview edit, V1 holds the interview picture, A1 the dialogue and A2 the music. Note which track goes quiet over the silent passage: if A2 plays and A1 doesn't, the dialogue clip and its track are your first suspects, not the speakers.
Keep the working edit intact. Run the comparisons in a temporary sequence or project, and go back to the same passage after each change. If every clip is silent, start at the computer ring instead; remapping source files one by one costs time before the output has been ruled out.
| Ring | Quick comparison | What it narrows down |
|---|---|---|
| Clip | Play the affected source in the Source Monitor. | Whether sound is there before the working sequence's mix. |
| Sequence | Try the same source in a new sequence. | Whether the original sequence's clips, tracks or mix need attention. |
| Project | Play a known test sound in a new project. | Whether the silence follows the original project or also reaches a clean one. |
| Computer | Play a known-good file outside Premiere and check the selected speakers. | Whether the operating system and the physical output can produce sound. |
I'd work through the rings in this order, because each comparison leaves the working sequence untouched until you know where the sound stops.
Clip: check Enable and the channel that carries the voice
Play the source before changing the mix. If the source has sound but its timeline instance doesn't, select the audio clip in the timeline and open the Clip menu. A checkmark beside Enable means the clip is on, and a disabled clip appears dimmed in the timeline. Check that clip's volume too. An alternate take that someone switched off on purpose can stay off.
A multichannel recording can carry the wanted microphone on a different source channel. Source audio channel mapping shows which channel Premiere is reading:
- Select the affected source clip in the Project panel.
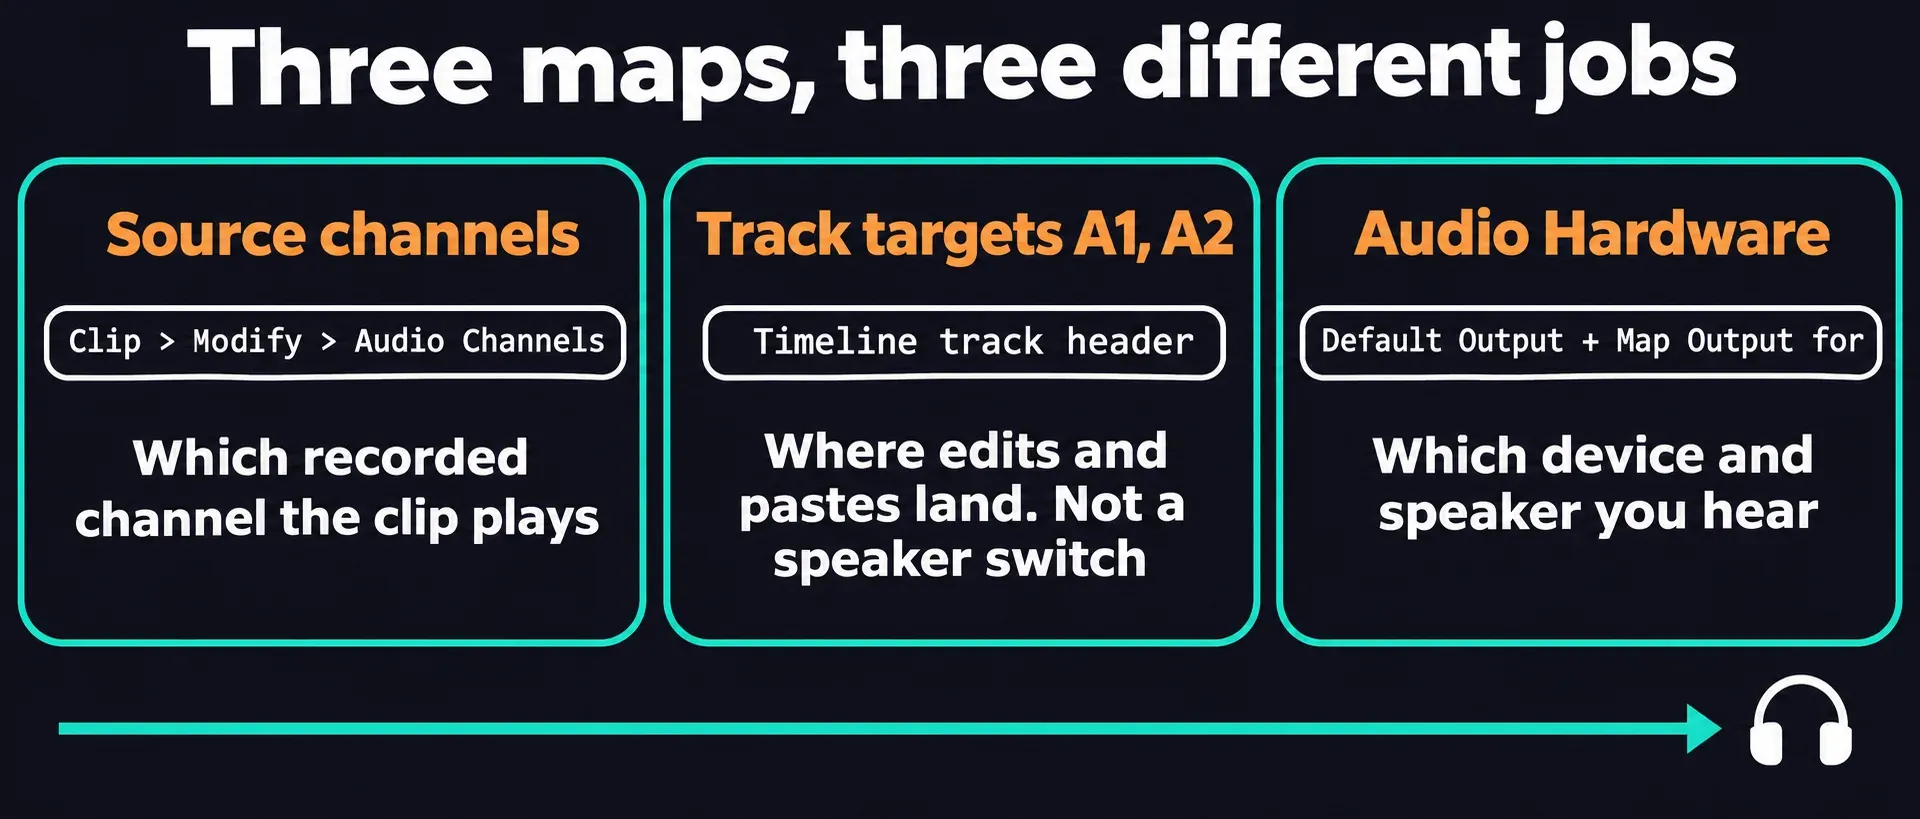
- Choose Clip > Modify > Audio Channels.
- Preview the source channels to find the one that contains the wanted sound.
- In the matrix, map the intended clip channel to that source channel, then choose OK.
Start with one source. Several clips can share one change only when their track format matches, and Adobe warns against proxies in workflows that rely on Modify Audio Channels. Check the result in a fresh temporary sequence first, then listen to each instance in the working cut rather than assuming the new mapping reached all of them.
If the file is missing rather than merely silent, follow the Media Offline and relinking steps. After a clip-level change, park the playhead just before its entrance and listen through the cut. The voice should arrive with the picture.
Sequence: inspect M, Solo and the mix
Put the affected source into a temporary new sequence in the same project and play the same passage. If you hear it there, the original sequence is the problem, so go back and inspect its clip and track controls below. If it's silent in both sequences, still run those checks, then move on to the clean-project comparison. Changing every track in the working cut would only make that comparison harder to read.
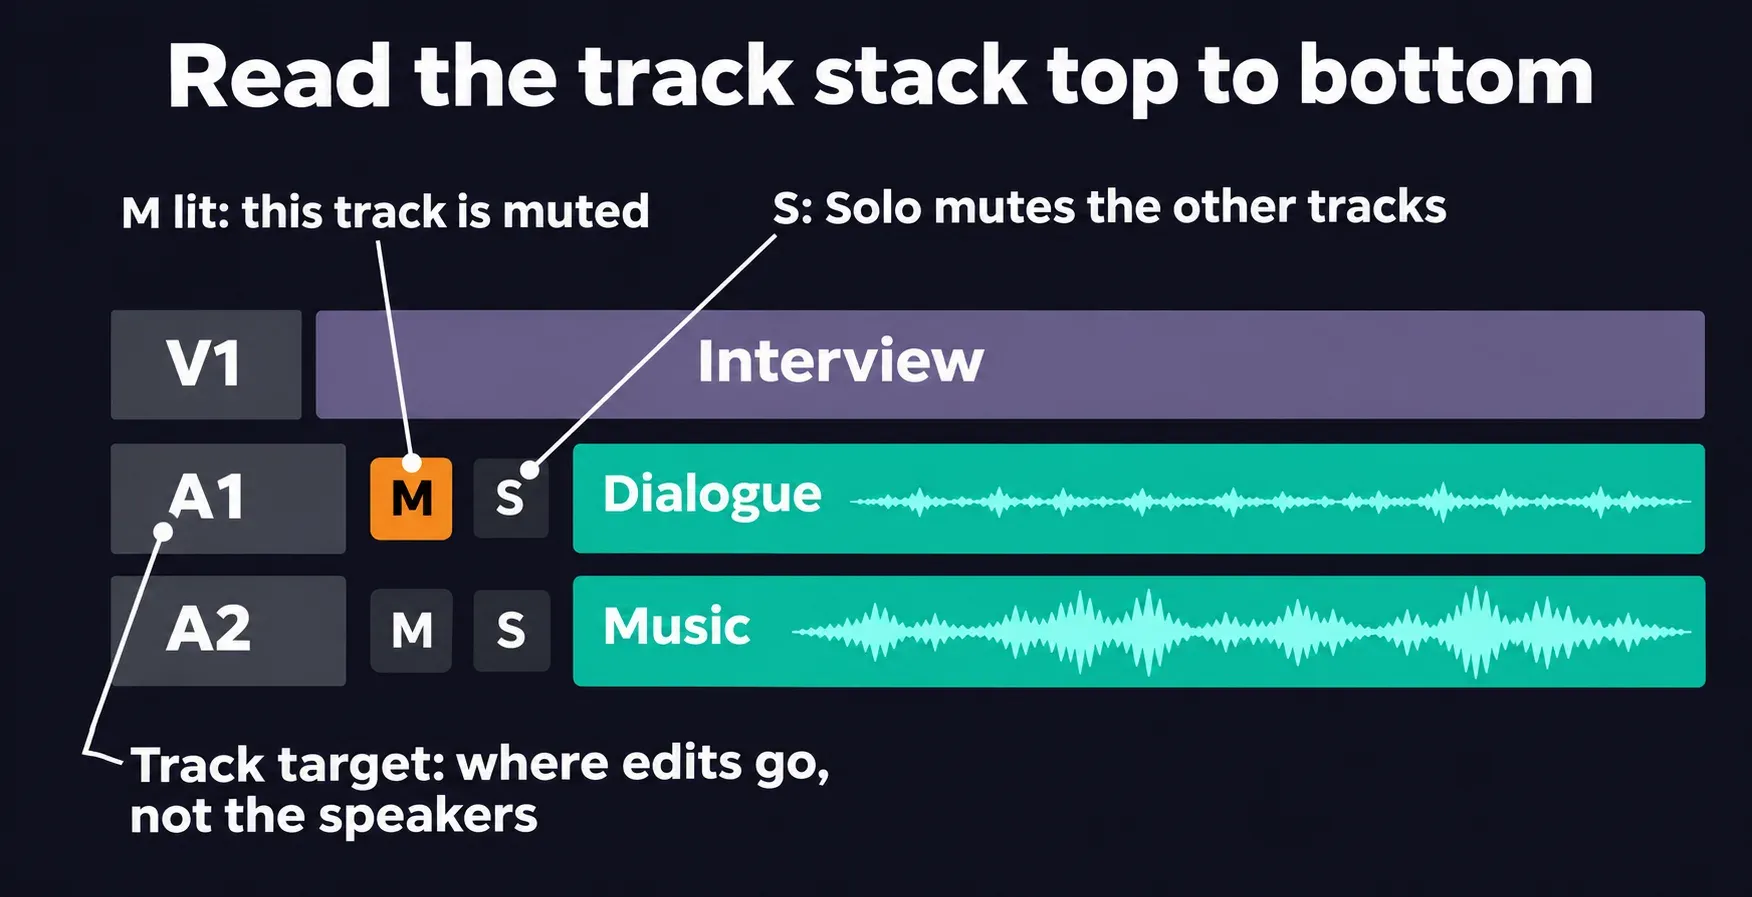
Open Window > Audio Track Mixer > [Sequence Name], or look at the track controls at the left of the timeline. A highlighted M means that track is muted; select it to bring the sound back when the track should be audible.
Look for a Solo selection as well. The S icon in the Audio Track Mixer is Solo Track, and selecting Solo mutes the other audio tracks. One soloed music track left over from an earlier session is enough to silence the dialogue, so clear that before you touch any levels.
The Audio Track Mixer controls whole tracks; the Audio Clip Mixer controls individual clips. Watch both the affected track and the Mix fader during the silent passage: a Mix fader pulled all the way down silences every track in the sequence at once, even while the waveforms look normal. Keep deliberate fades and automation in place rather than resetting every fader to the same value.
A1 and A2 track targets control editing operations, such as where pasted material lands. They aren't speaker selectors. If playback works but a microphone recording is silent, the microphone settings guide covers the recording input.
Project: compare a known tone in a clean project
When the earlier comparisons don't settle the cause, Adobe's Bars and Tone diagnostic gives you a known test sound. Turn the listening volume down to a comfortable level before you play the steady tone.
- Create a new project, keeping the working project saved.
- Right-click an empty area of the Project panel (Control-click on a Mac) and choose New Item > Bars and Tone.
- Accept the defaults in New Bars and Tone and select OK.
- Double-click the new clip to open it in the Source Monitor, then select Play. You can also play it from the timeline.
If the tone plays, the output works in that clean project. Now import the affected source there and play the same passage in the Source Monitor. If the source plays too, the fault sits in the original project or sequence. If the tone plays but the source stays silent, keep working on that file and its source channels. A playing tone clears the output, not the affected file.
If the tone is silent as well, check the computer and Premiere's output settings below before you rebuild any cache.
Computer: match the speakers in the OS and Premiere
Play a known-good file outside Premiere through the speakers or headphones you intend to use. If that's silent too, check the device's power, cable, mute and listening volume before you change the edit.
- Windows 11: select the Speakers icon on the taskbar and the arrow beside the volume slider to see which output is active, or open Start > Settings > System > Sound. Microsoft's sound troubleshooting guide also has you check each device and app in the volume mixer for a mute.
- macOS: choose Apple menu > System Settings > Sound > Output, pick the device you want, and check the output volume and Mute checkbox.
Then check Premiere's Audio Hardware panel: Edit > Preferences > Audio Hardware on Windows, or Premiere > Settings > Audio Hardware on macOS. In the Audio Hardware preferences, Default Output picks the device you monitor through and Default Input picks the recording source. Set Default Output to the device you want to hear.
If the device is right but the sound reaches the wrong hardware channel, look at Map Output for in the same panel. It assigns each supported audio channel to a speaker in your computer's sound system. That's a separate map from the source-channel matrix and from the A1/A2 editing targets. Play the same passage again after the change.
Only then rebuild the cache or convert the audio
Cache rebuilding costs time
Save a copy of the project first: deleted cache files have to be recreated when the source media needs them. The media cache holds .pek peak files and .cfa conformed audio. A drawn waveform comes from that cache and says nothing about whether the current output is audible, which is why clearing it waits until the clip, mix and output checks are done.
To use Adobe's cache removal controls, open Edit > Preferences > Media Cache on Windows or Premiere > Settings > Media Cache on macOS, then select Delete beside Remove Media Cache Files. The unused-files option removes cache created for source media that can no longer be found. Removing all cache is broader: close all projects with File > Close All Projects, restart Premiere, and choose that option before you open a project.
I'd start with the unused-files option, since it leaves the cache for media that's still connected, and remove all cache only if the silence survives. Keep the original media and project files either way, and let the cache rebuild before you judge playback.
Convert only the file that stays silent
If one file plays outside Premiere but stays silent in its Source Monitor and in a clean project after the channel checks, its audio encoding may be one Premiere can't decode. Adobe's codec troubleshooting branch suggests transcoding that file in other software to a different audio encoding and importing the result. Keep the original, try the converted copy in a temporary sequence, and pick an encoding your workflow supports rather than running one preset over every silent file.
Play through the repaired passage
Once sound returns, play from a few seconds before the affected cut through the next one. Listen for the dialogue, its sync with the picture and any music that should sit underneath. If the music now covers the voice, the music-under-dialogue steps show how to bring it back under.