How to make rolling credits in Premiere Pro
Build a role-and-name layout in one text layer, find native Roll in Properties, or set a manual upward pass with Position keyframes. Check the actual names in motion before exporting.

To make rolling credits in Premiere Pro, build the list inside one graphic and enable Roll in Properties. Select the graphic clip in the Timeline and deselect its individual layers in the Program Monitor so Roll is visible. Native Roll is where I'd start for a complete end-credit list: it puts the offscreen start and end controls together, and role and name columns can sit in two text layers of that graphic in any font. Use the manual Position method below when you want to set the travel time with two keyframes.
These steps use desktop Adobe Premiere, formerly Premiere Pro. Settle the picture and its timing first, then sound and color. Credits and the other words on screen come after those decisions, with the exported file last. A late change to the ending means checking the credit start, motion keyframes and music end again.
Build the credit columns inside one graphic
Over a closing shot, an example track stack is V2 credits, V1 closing picture; A1 dialogue, A2 music. Keep every column inside that one graphic clip. Roll belongs to the graphic you select in the Timeline, and Adobe's credit-roll steps let its text or other layers start and end offscreen, so every layer in that graphic travels as one block.
Two graphic clips on two tracks are the setup to avoid. In an Adobe Community thread on two-column rolling credits, an editor's two columns rolled at different speeds until both were exactly the same length. I'd take Neil Haugen's answer in that thread: put all the layers inside one graphic, select it with no layers selected and enable Roll, and the whole graphic rolls as one. Nothing has to be matched by hand.
Two text layers: any font
This is the layout I'd build first. Each column starts at its own layer edge, so proportional type lines up without any padding.
- Park the playhead where the credits should begin. Select the Type tool (T on macOS or Windows) and type in the Program Monitor to add text: the roles, one per line, with Enter after each.
- Right-click the title and choose Edit Properties. Choose the font, style and size, and set paragraph alignment to left.
- Keep that graphic clip selected in the Timeline. Click with the Type tool in an empty area to the right of the roles and type the names in the same order, one per line. Check the Timeline: the names should join the same graphic clip as a second layer. If a new graphic clip appears on another track, undo it and repeat with the first clip selected.
- Give the names the same font, size and paragraph alignment, so both layers run at the same line spacing. Keep the line counts equal too: a blank line between departments in one column needs a matching blank line in the other.
- Select both layers in the Program Monitor, right-click and choose Align to Selection, then align their top edges. Adobe's Align objects guide covers aligning several text and shape layers in one graphic, either to the video frame or to a selected key object.
Play through to the last rows. If the final name sits above or below its role, the layers differ in font, size or line count; fix that difference rather than nudging one layer.
One text layer with a monospaced font
Use a single layer when you'll animate Position by hand: the manual pass below moves one text layer, so both columns have to live in it. Role and name then share one row of text and can't drift apart. Ordinary spaces do the aligning here, and that only works when every character has the same width.
Use an already available monospaced font. Source Code Pro Regular is one option if it appears in your font list; Adobe describes the Source Code Pro family as monospaced. With uniform character widths, ordinary spaces can line up the names; keep the formatting conditions below intact.
- Park the playhead where the credits should begin and create a text layer with the Type tool, as in the first method. Enter all the credits in that one layer, with an explicit line break after each role-and-name row.
- Open the title's properties the same way. Apply the same font, style and size to the whole block. Keep character spacing uniform, with no individual kerning or tracking adjustments.
- Set paragraph alignment to left. Keep both roles and names left aligned; avoid paragraph justification. This is a plain-space construction for a monospaced face, with no tab stops.
- Type ordinary spaces after each role, using the example below. Don't press Tab. Leave enough width for every complete row to remain on one line.
Space padding for the illustrative monospaced credit rows:
| Role | Ordinary spaces after role | Example name |
|---|---|---|
| Director | 9 | Maya Patel |
| Sound | 12 | Eli Chen |
| Camera operator | 2 | Noor Ali |
Copy these three rows as plain text. The ordinary spaces between each role and name are intentional:
Director         Maya Patel
Sound            Eli Chen
Camera operator  Noor Ali
The names are examples. Every row sticks to basic Latin characters, which the monospaced font covers, so each glyph keeps the same width. The longest role, Camera operator, contains 15 characters including its internal space. Reserve that width plus two spaces: Director has eight characters and needs nine spaces; Sound has five and needs twelve. Each name begins at character 18, counting from one at the start of its row.
This alignment requires each character, including spaces, to occupy the same horizontal distance. A substituted glyph, a wrapped row or an individual spacing override can break the alignment. Return the block to uniform formatting and check the actual name starts. If a longer role is added, recalculate the padding for every row; don't squeeze individual letters to fit.
Whichever layout you build, check the first, longest and last rows before animating. Read them at the intended playback size, and repeat that check after changing the font, size, spacing or available width.
Find Roll in the current Properties panel
Older tutorials edit graphics in Essential Graphics. Adobe moved many of those editing functions to Properties starting with version 25.0. Follow the current panel names when the tutorial's screen differs from yours.
- Select the graphic clip in the Timeline.
- Deselect the individual text layers in the Program Monitor. Roll is hidden while one or more layers are selected there.
- In Properties, select Roll. To have the credits enter and clear the frame, specify that the layers start and end offscreen.
- Adjust Preroll, Postroll, Ease in and Ease out using their timecode values. Play through both ends after a change.
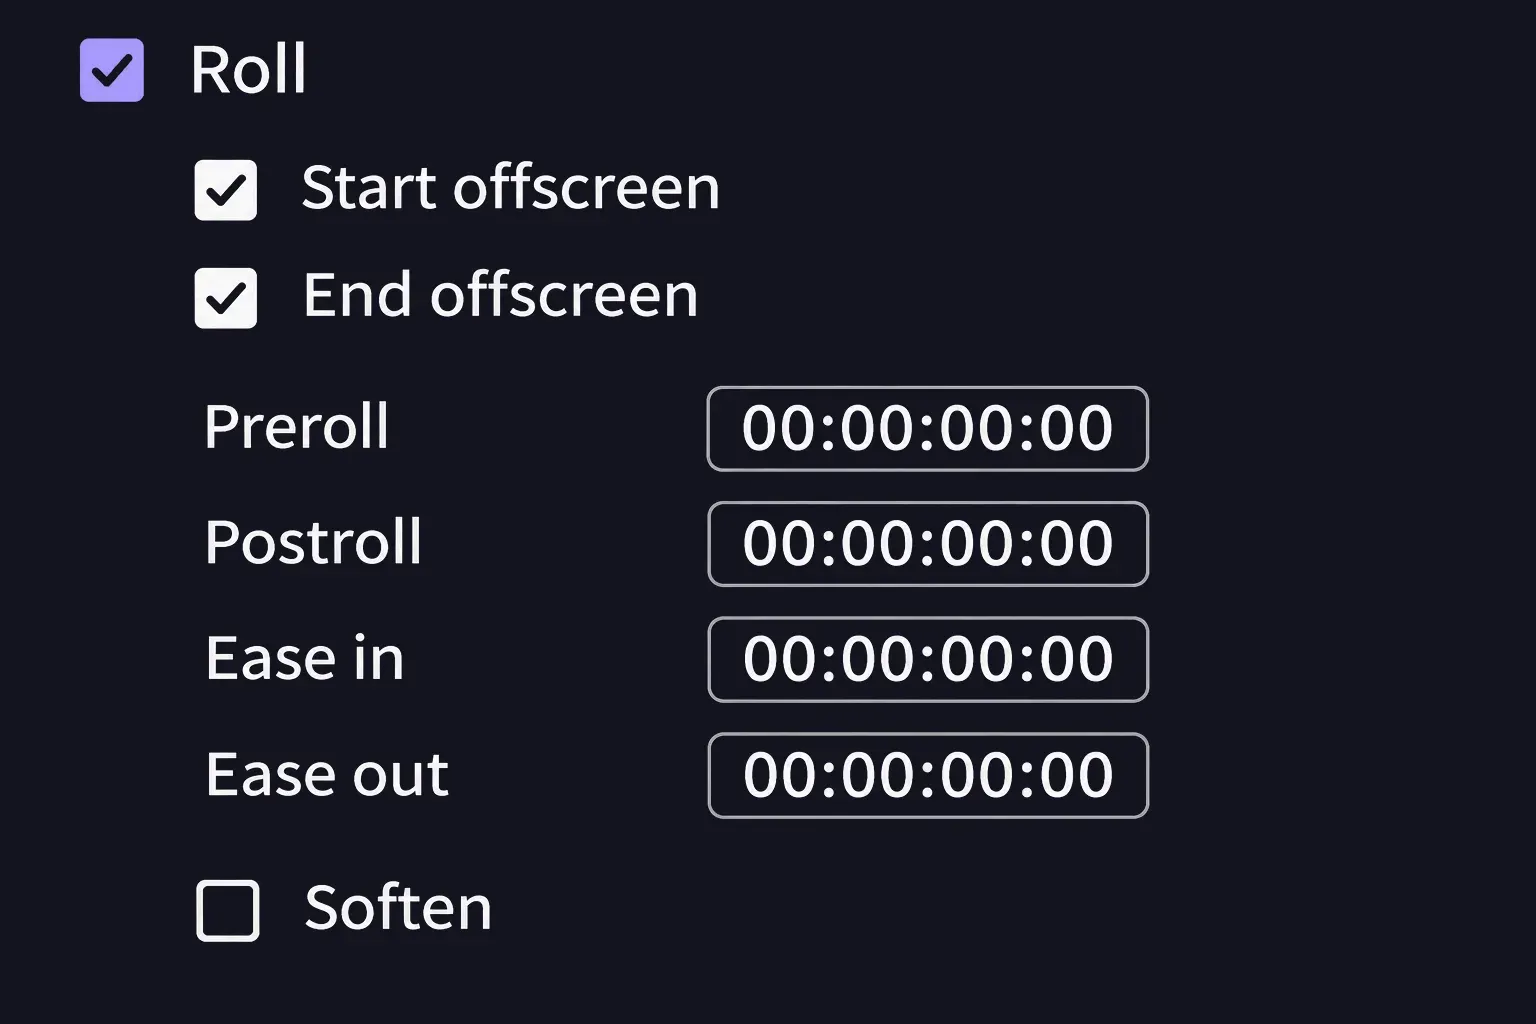
Roll moves the credits vertically. With a long list, the translucent blue scrollbar in the Program Monitor provides Document View: scroll through the text to edit it without moving the playhead. That scrollbar navigates the document; use timeline playback to judge the moving credits.
Park the playhead a little before the graphic begins and play across the entry. Watch the first row enter, then continue through the final row's exit.
The clip's length sets the roll speed. Neil Haugen spells it out in a community answer on long credit rolls: a longer graphic clip rolls more slowly, a shorter one faster. Stretch or trim the clip, then play both ends again.
Set a readable duration with Position keyframes
When you want deliberate start and finish times, use Position keyframes to animate text. Start with a fresh static graphic built as the one-layer variant above, because these keyframes move a single text layer. Leave native Roll off while using this manual method.
- Set the graphic's interval first. Select its clip in the Timeline, hover over an edge until the trim icon appears, then drag the edge to the intended length. Choose a first motion time and a later finish time inside that clip.
- At the first motion time, select the text layer in Properties. Under Align and Transform, enable animation for the layer's Position. Set Position so the top of the whole credit block sits below the bottom edge of the frame. Check that this endpoint has a keyframe in Effect Controls.
- Move the playhead to the chosen finish time. Set the same layer's Position so the bottom of the last row is above the top edge of the frame. Keep the horizontal Position value the same at both endpoints for an upward pass.
- Use Effect Controls to refine the Position animation. Adobe's layer animation instructions describe adding keyframes there. Keep the two endpoint positions fixed while adjusting their times: allow a longer interval for more reading time, or a shorter interval for less. Keep the finish later than the start and both keyframes inside the graphic.
- Play the complete pass at the intended viewing size. Check that the first and last names clear the frame and that you can read each name before it leaves. Adjust the endpoint positions or times deliberately, then play again.
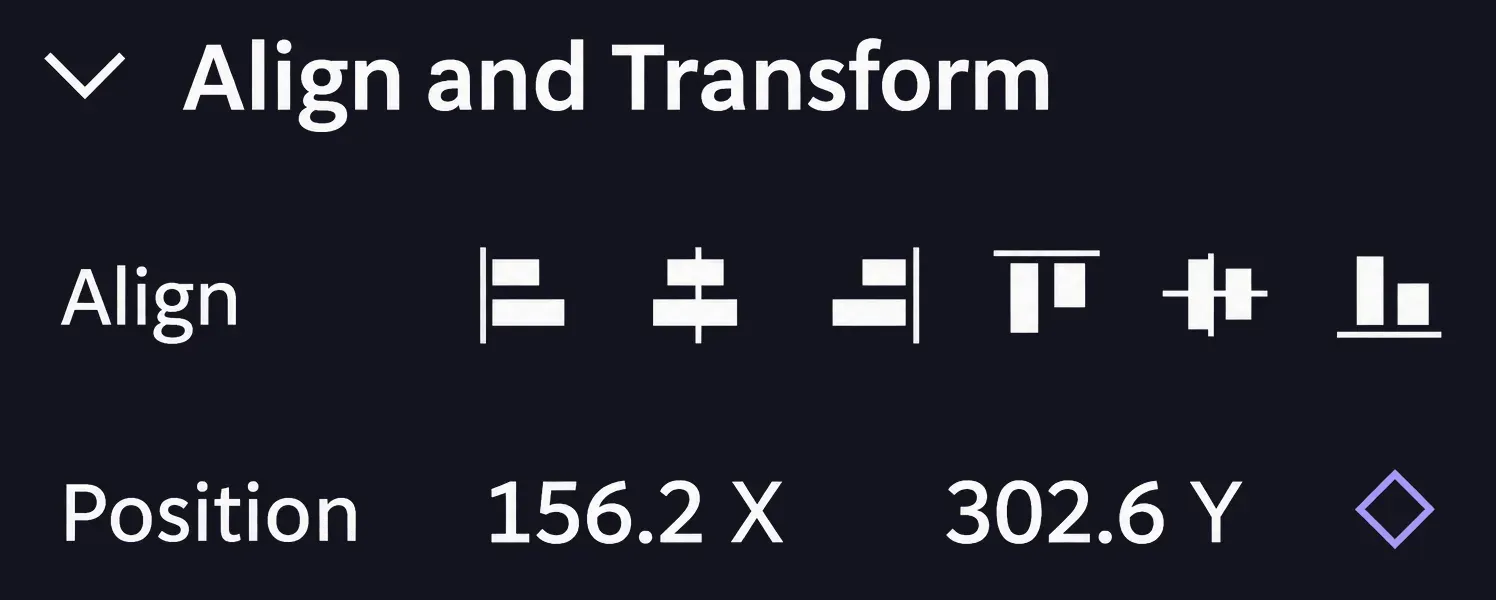
Read the actual credit list without pausing playback. If a long name leaves before you finish reading it, give the pass more time with the final keyframe. After changing a clip edge, inspect the keyframe times explicitly; trimming the graphic is a separate action from setting the motion's duration.
Keep fine text readable during the move
Choose a size and weight you can read in motion at the final viewing size. If fine strokes are hard to follow, try a stronger weight or more space between rows, then recheck the whole block. On the native Roll route, Adobe's Soften option smooths rolling-text motion; judge its effect during playback.
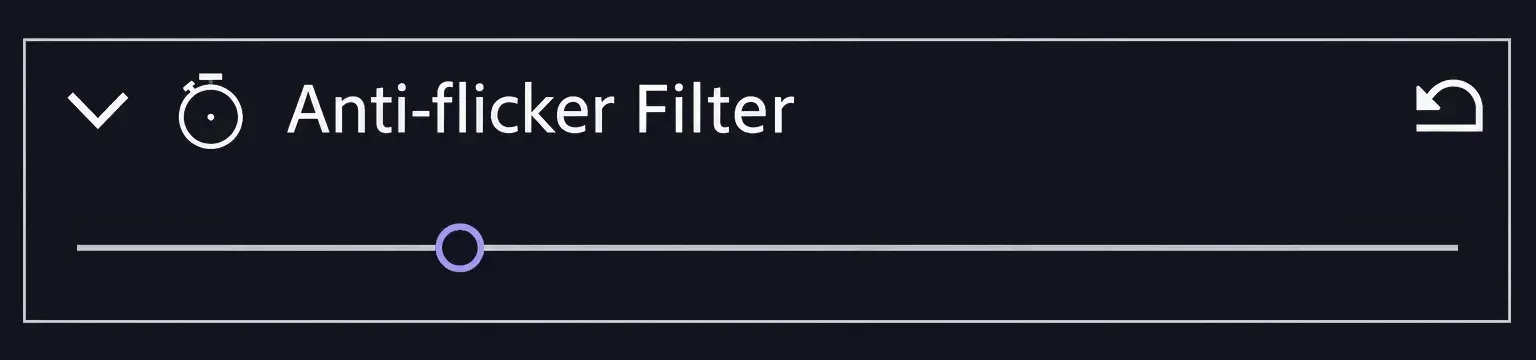
When thin lines or sharp edges flicker on interlaced displays, select the clip and open Effect Controls > Motion > Anti-flicker Filter. Increasing its strength reduces more flicker but also softens the image. Balance those effects on the moving text. If the video is progressive and the motion looks uneven, check playback and keyframe timing before applying an interlaced-display fix.
Use a sideways pass or repeat after a blank gap
A sideways line uses the same Position method on a fresh static text graphic. Put the whole line beyond the right edge at the first keyframe and beyond the left edge at the later one, keeping its vertical Position value unchanged. Check the line's full entry and exit during playback.
Repeated scrolling text needs a separate pass built with the same text-creation and Position steps. Start it after the previous pass has fully cleared and leave a blank gap before the restart. Play from the end of one pass through the next entry to check that the blank interval lasts as intended.
After a late edit to the ending or credit list, recheck the row alignment and both motion endpoints, then inspect the keyframe times. Revisit the music ending too. Play from the closing picture through the last credit and the final frame, then export the finished sequence with File > Export > Media (Cmd+M on macOS, Ctrl+M on Windows) and watch the file in its intended player.