Speed ramp in Premiere Pro: keyframes, curves and smooth slow motion
Build a gradual speed change on one clip, use its recorded frames well, then check the picture and sound across the ramp.
Right-click the clip in Premiere Pro and choose Show Clip Keyframes > Time Remapping > Speed. Add two speed keyframes with Ctrl-click (Windows) or Command-click (macOS), lower the band between them, then pull each keyframe's halves apart to make the speed change gradual. Choose the slow-motion percentage from the clip and sequence frame rates; those rates determine when Premiere needs to fill in missing frames.
Adobe defines speed ramping as a gradual change in a clip's speed between slow motion, standard speed and fast motion, and its own route to one is speed keyframes on Time Remapping, which every clip already carries as a built-in effect. The steps below need no preset or plugin.
These steps are for Adobe Premiere on Windows and macOS. Keyboard shortcuts use the default mapping.
The shot, the sequence and the room after it
The steps assume a sequence open in the Timeline panel with the shot already cut in. Written top to bottom as the timeline shows it, the example used on this page is: V1, a skateboarder's run up to a jump, with the shots before and after it on the same track; A1, the run's linked sound directly under it. Cutting the shot in and trimming it are covered in the editing guides.
Slowing part of a shot makes the clip run longer, and speeding part of it up makes it shorter. Leave room after the shot before changing its speed, as Adobe's Time Remapping instructions require, then check the end of the clip and the first frame of the next shot after each adjustment.
A ramp also shifts every frame of the shot that comes after the first keyframe. Ramp while the cut is still being built: captions, titles and music hits timed to this shot go on once its speed has stopped changing, or they get moved twice.
How slow the footage can go on its own frames
Adobe defines a clip's speed as the rate it plays back compared to the rate at which it was recorded. A clip Premiere reads as 120 frames per second, placed in a 24 fps sequence, plays in real time at 100%, so the sequence shows one recorded frame in five. Slow it to 20% and it shows every recorded frame once. Divide the sequence's frame rate by the clip's and you have that percentage for any pair.
Read both frame rates before choosing a slow-motion percentage. For the sequence, open Sequence > Sequence Settings and read Timebase. Close the dialog without changing it: changing core sequence settings can affect playback or quality. For the clip, right-click it in the Project panel (Ctrl-click on macOS) and choose Properties to read its frame rate. A sequence created from the clip inherits its frame rate. If a 120 fps clip has created a 120 fps sequence, the division gives 100%, so that sequence has no slow-motion headroom on recorded frames alone. For a new slow-motion edit, choose your intended delivery rate in a sequence preset or custom sequence.
Use the actual rates in the division. The whole-number examples below also work for matching fractional-rate families: 59.94 fps in 29.97 fps gives 50%, and 119.88 fps in 23.976 fps gives 20%. If one rate is fractional and the other is a whole number, calculate that pair directly rather than rounding first.
| Clip frame rate (Properties) | Sequence Timebase | Slowest speed that shows each recorded frame once |
|---|---|---|
| 60 fps | 30 fps | 50% |
| 60 fps | 24 fps | 40% |
| 120 fps | 30 fps | 25% |
| 120 fps | 24 fps | 20% |
Below that percentage the recorded frames run out. A 24 fps sequence needs 24 frames for every second of playback, the slowed clip has fewer to give, and Premiere repeats, blends or creates frames to fill the gap; the three Time Interpolation methods covered further down are the ways it does that. A clip at the sequence's own rate starts there: at 100% it already uses every frame, so any slow motion depends on interpolation.
High frame rate footage is sometimes conformed instead: in the Project panel, right-click (Windows) or Ctrl-click (macOS) the clip, then Modify > Interpret Footage > Assume this frame rate. Adobe's page on changing a clip's frame rate says this changes the audio as well, scales the duration in proportion (a 10-second clip at 24 fps set to 48 fps becomes 5 seconds) and applies everywhere the clip is used in the project. A ramp needs none of that, because speed keyframes act on the one instance in the timeline. If the clip has already been interpreted, run the division again with its new frame rate.
Show the speed band on the clip
With the Selection tool active (it is the default tool), right-click the shot in the Timeline panel and choose Show Clip Keyframes > Time Remapping > Speed. Adobe's Time Remapping steps describe what appears: a horizontal white band and a rubber band across the center of the clip. Every speed change on this page is made on that band.
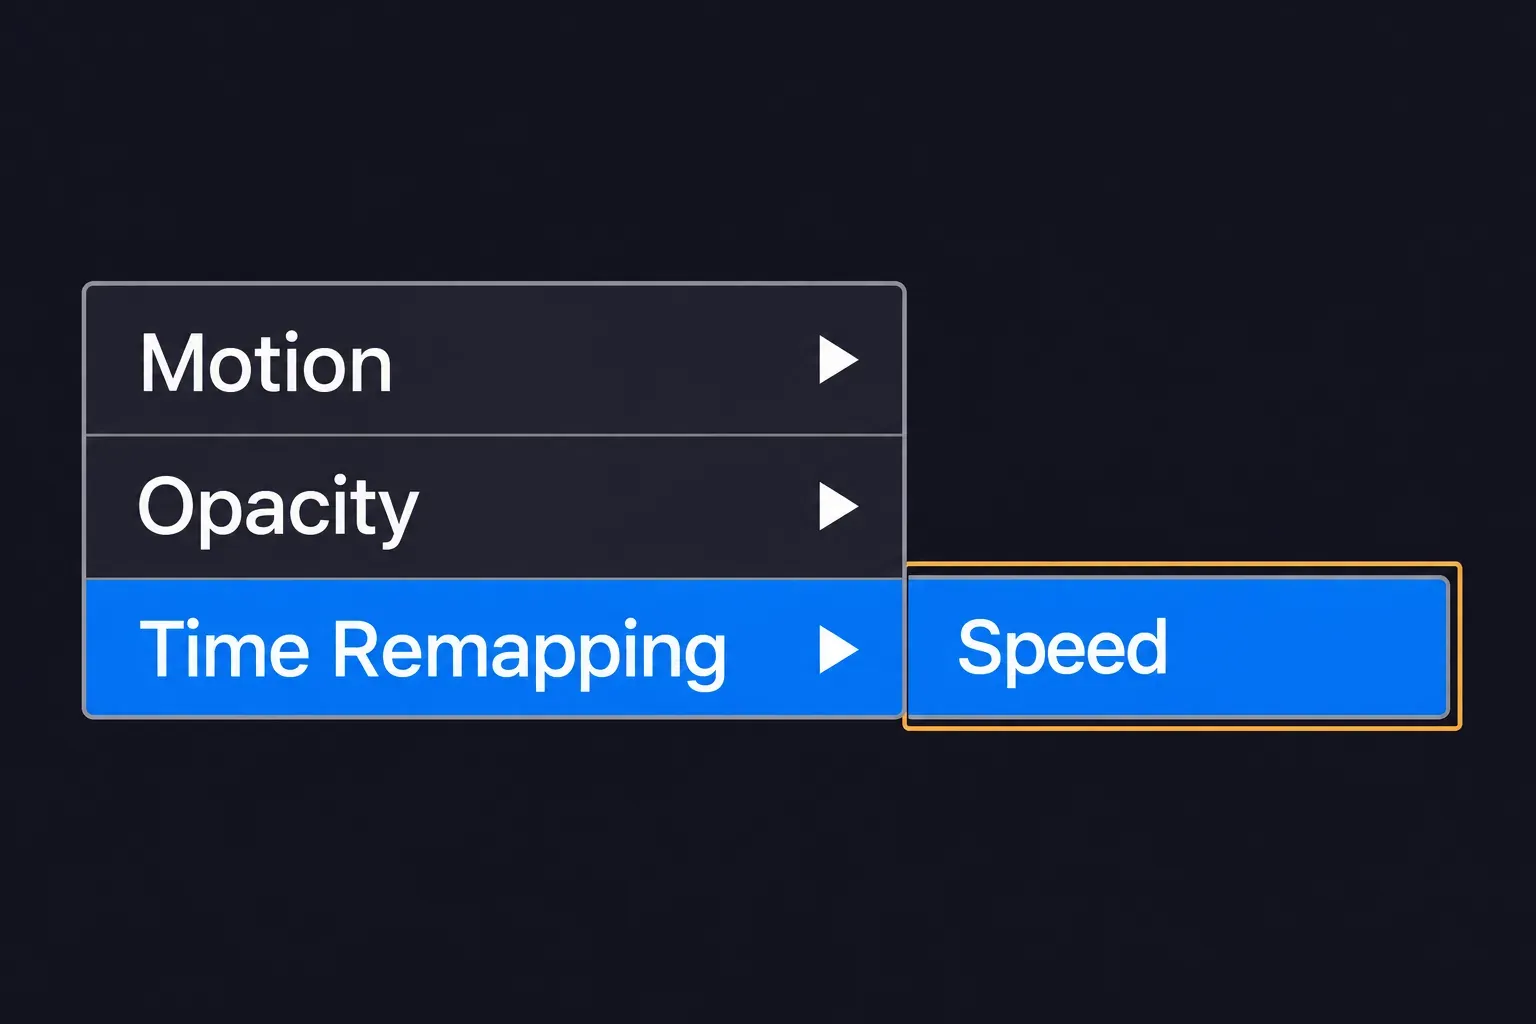
Open the full-size Time Remapping menu to read the controls and labels.
The User Guide's freeze-frame steps reach the same Time Remapping > Speed choice another way, from the clip's Show Clip Keyframes badge. The FX badge is a separate control: the User Guide places FX badges at the top-right corner of a clip, and selecting one opens Effect Controls. Right-clicking the clip body works wherever the badges sit, which is why the steps here use it.
At the default track height the band is a thin target. Drag the line between two track headers to make V1 taller, which Adobe's page on track appearance recommends for seeing icons and keyframes, or press Ctrl + = (Windows) or Cmd + = (macOS), the default keys for Increase Video Tracks Height; Ctrl + - or Cmd + - takes it back down.
The timeline shows the keyframes of one property per clip at a time, and hovering a keyframe names the property it belongs to. If the shot already has Opacity or Motion keyframes, they are hidden while Speed is shown, not gone. Check before moving on: the band runs level across the clip, and nothing in the shot has changed yet.
Put a keyframe where the speed changes
Move the playhead through the shot and watch the Program Monitor for the frame where the slow motion should begin; in the example, the moment the board leaves the ground. With the Selection tool still active, Ctrl-click (Windows) or Command-click (macOS) the band at that point. Find the frame where normal speed should return, the landing, and do the same there. Each click adds a speed keyframe, and the band now has separate segments either side of each one, which is how the Time Remapping page says speed segments are made.
The Pen tool in the Tools panel sets keyframes the same way, with the same Ctrl-click or Command-click on the line, and Shift-click with it selects keyframes that are not next to each other. Hover the tool to see its current key rather than relying on a letter from a tutorial.
A keyframe is not a cut. Ctrl + K (Windows) or Cmd + K (macOS) is Add Edit, which cuts the clip in two; speed keyframes leave it one clip with one continuous band. If the slow part should instead become a separate clip at one constant speed, split the clip first and give that piece its own speed.
Play across the two keyframes from a little before the first one. The shot should look exactly as it did, because no speed has changed yet.
Set the speed of each stretch
Drag the band between the two keyframes down. As you drag, a tool tip shows the new speed as a percentage of the original, and slowing the stretch lengthens the clip. Pick the number with the table in mind: for 120 fps footage in a 24 fps sequence, anything from 100% down to 20% stays on recorded frames, while a 30 fps clip in a 30 fps sequence has no recorded frames to spare at any speed below 100%.
For a fast approach into the slow motion, drag the band before the first keyframe up above 100%, and the stretch after the landing up as well if the shot should leave quickly. Then glance at the end of the clip and the next shot, as in the room check above.
Park the playhead a little before the first keyframe and play through to just past the second. At this stage the speed changes in a single step at each keyframe: Adobe's guide calls an unsplit change instantaneous. That jump is what the next section turns into a ramp.
Pull the keyframe apart into a ramp
With the Selection tool, drag one side of the first keyframe marker away from the other. Adobe's speed ramp guide gives the rule for how far: the farther apart the halves, the more gradual the change. The band between the two halves becomes a slope, and that slope is the ramp. Do the same at the second keyframe so the return to normal speed is gradual too.
To shape the slope, click a keyframe to select it and drag the Bezier handles that appear; the Time Remapping page describes them as setting the rate of speed change, so a gentle curve at the top and bottom of the slope eases the shot into and out of the slow motion instead of turning a corner.
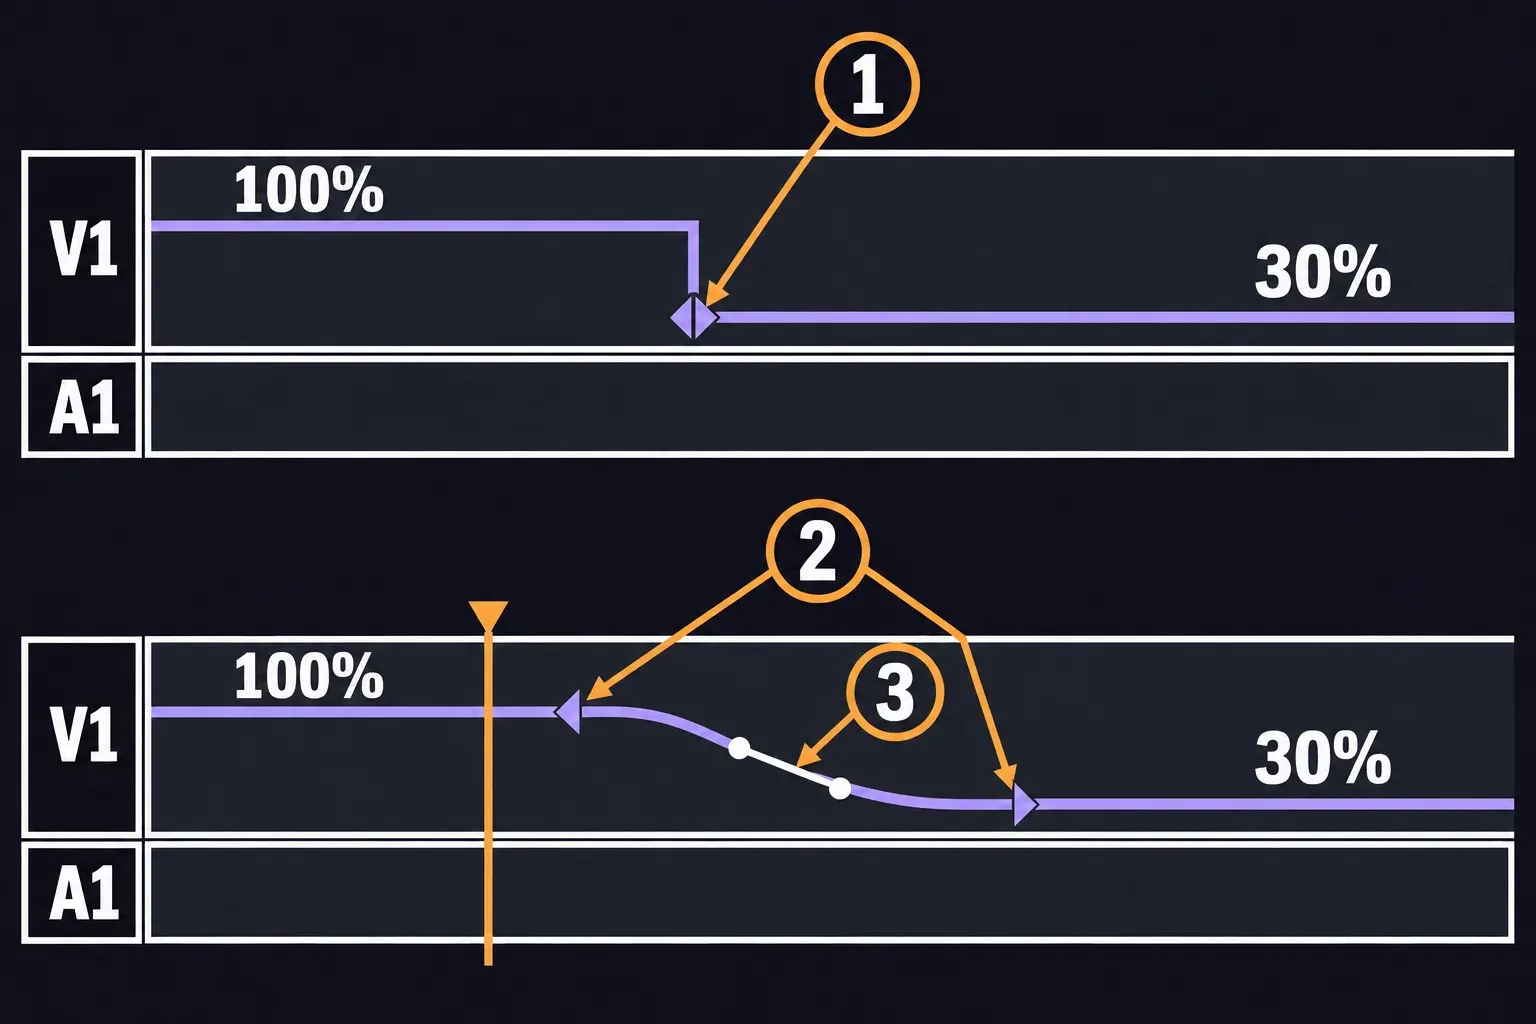
Open the full-size speed-ramp diagram to read the controls and labels.
Play the shot again from a little before the first slope. The speed should now slide into the slow stretch over the frames between the halves rather than change on one frame. If it still feels like a jump, the halves are too close together; drag them farther apart and play again.
How Premiere fills the slow stretch
For a ramped clip, right-click the clip and choose Time Interpolation > Optical Flow, the route shown in Adobe's slow-motion exercise. The setting controls how Premiere fills the missing frames. The three interpolation methods work differently:
- Frame Sampling repeats or removes existing frames. It is the fastest, and Adobe suggests it for minor speed changes or a slightly choppy look.
- Frame Blending blends neighboring frames, for smoother slow motion, especially on footage without a lot of fast movement.
- Optical Flow analyzes the motion between frames and generates new ones. Adobe calls it the smoothest for significant speed changes and best on footage with clear motion and defined edges.
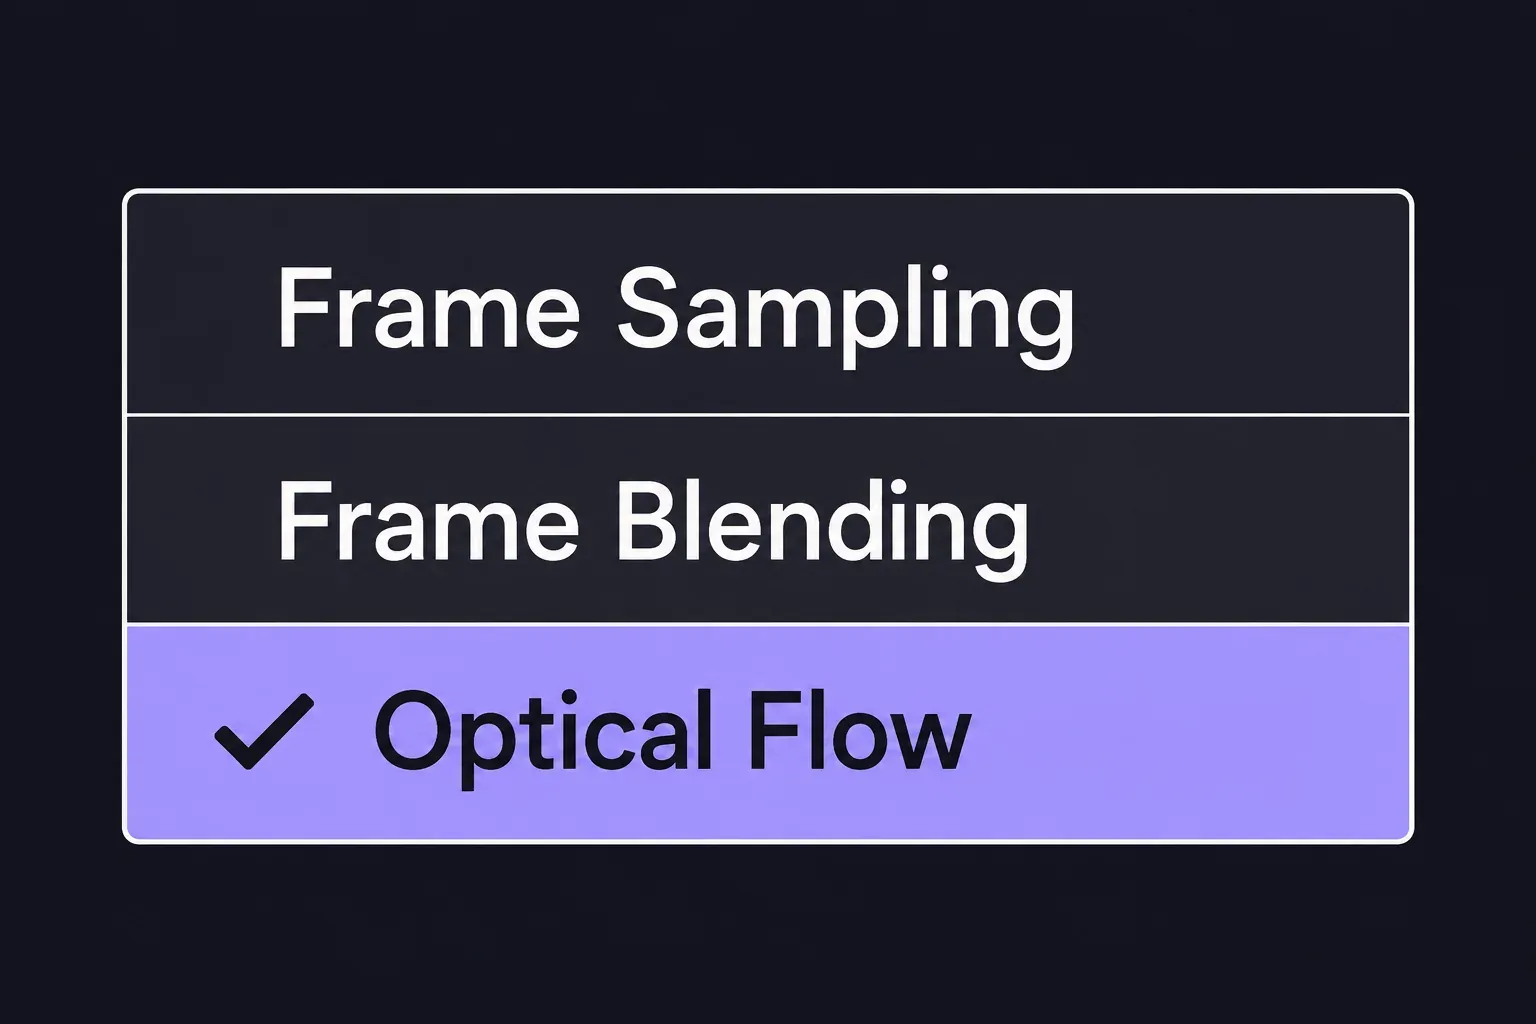
Optical Flow can be applied only from the timeline or the Export Settings dialog, not to a clip in the Project panel, as the overview of speed methods notes. It also comes with a caution in Adobe's export settings guide: it usually plays smoothest, but artifacts may appear where consecutive frames differ a lot, and the fix Adobe gives is to try one of the other methods. Frame Sampling, the same guide warns, may stutter or jitter on some footage.
I'd answer the frame-rate question first, because high-frame-rate footage may already contain the frames your slow stretch needs. After choosing interpolation, mark In and Out around the ramp and use Sequence > Render In to Out before judging its motion. When the whole clip should play at one constant speed, speed up or slow down the clip with Speed/Duration.
Play the slow stretch from a little before its slope to a little after. Stutter or jitter in the slow part, or artifacts around anything moving fast, are the cue to try another method and play it again.
The sound under the ramp
Time Remapping changes the picture, and linked audio does not follow the same variable speed curve. A sound tied to a visible action can drift once the picture changes speed. Plan the sound separately: keep the speaking shot and its synchronized dialogue at normal speed, or reserve the ramp for a shot whose original sound you can mute or replace. Changing audio pitch alone will not make a sound land on the right frame.
For a separate section at one constant speed, use Speed/Duration and Maintain audio pitch to preserve pitch while changing its speed. That constant-speed adjustment does not create a matching audio ramp. Place music hits after the picture ramp is settled; the steps to add music pick up from there.
Listen from a little before the first slope to just past the landing. Whatever plays on A1 should be the sound you chose, at every speed.
Freeze a frame inside the ramp
A hold at the top of the jump is one more speed segment, and Adobe lists it as a way to build a stylized speed ramp. The steps to hold a frame with Time Remapping:
- Ctrl-click (Windows) or Command-click (macOS) the band at the frame you want to hold, to add a speed keyframe there.
- Drag the keyframe downward until the speed reads 0%.
- Hold Ctrl + Alt (Windows) or Option + Command (macOS) and drag the keyframe sideways. The farther you drag, the longer the frame holds; let go of the mouse when the hold is the length you want.
The flat stretch at 0% is the frozen frame. Play from a little before the hold to past its end, and watch the frame where motion starts again for a jump in speed you did not intend.
Move, delete or take the ramp off
A keyframe in the wrong place moves: drag it left or right along the speed band. To delete one, select it and press Delete. Either change can alter the clip's length again, so look at the next shot afterwards.
Taking Time Remapping off the clip is a bigger step than deleting a keyframe. It removes every speed keyframe on the clip, holds included, and returns the clip to its original duration. If any of the ramp is worth keeping, delete single keyframes instead. To clear the lot, remove Time Remapping this way: select the clip, choose Window > Effect Controls, expand Time Remapping and turn off the Toggle Animation button next to Speed.
Play the shot across both ends afterwards. It should be back to its original duration and play at one even speed from its first frame to its last.
Render the ramp, then watch the exported file
Look at the render bar above the ramped clip. Adobe's guide to render bars above the timeline reads them this way: red means unrendered and likely not smooth, yellow unrendered but may play in real time, green rendered. Press I a little before the ramp and O a little after it to mark the stretch. Sequence > Render Effects In to Out (Enter) renders the red sections; Sequence > Render In to Out takes in yellow ones too. The same page points to the Maximum Render Quality option in Sequence Settings for the best motion in preview files.
If a steep ramp still will not play in real time, the Time Remapping page suggests proxies or lower resolution previews while you edit.
Keep the export at the sequence's intended delivery rate. The export Time Interpolation setting generates or removes frames when the exported frame rate differs from the source. Adobe also says Use Previews can speed up an export but may impact quality depending on the preview format; I'd leave it off for the file that leaves, because Adobe ties the time saved to a possible loss of quality.
Open the exported file where it is going to be watched: on the phone, in the platform's upload preview, or in the player the client uses. Play it from a few seconds before the ramp to a few seconds after, and watch that the speed slides down and back up as it did in the timeline, and that a hold, if there is one, ends where you set it. If the fast run-in looks too crisp beside the slow stretch, the next move is to add motion blur.