How to speed up or slow down a clip in Premiere Pro
Set a speed with Clip > Speed/Duration or drag a clip to length with Rate Stretch, read the new length, then choose whether the next clips move, whether the voice keeps its pitch and how Premiere fills slow-motion frames.
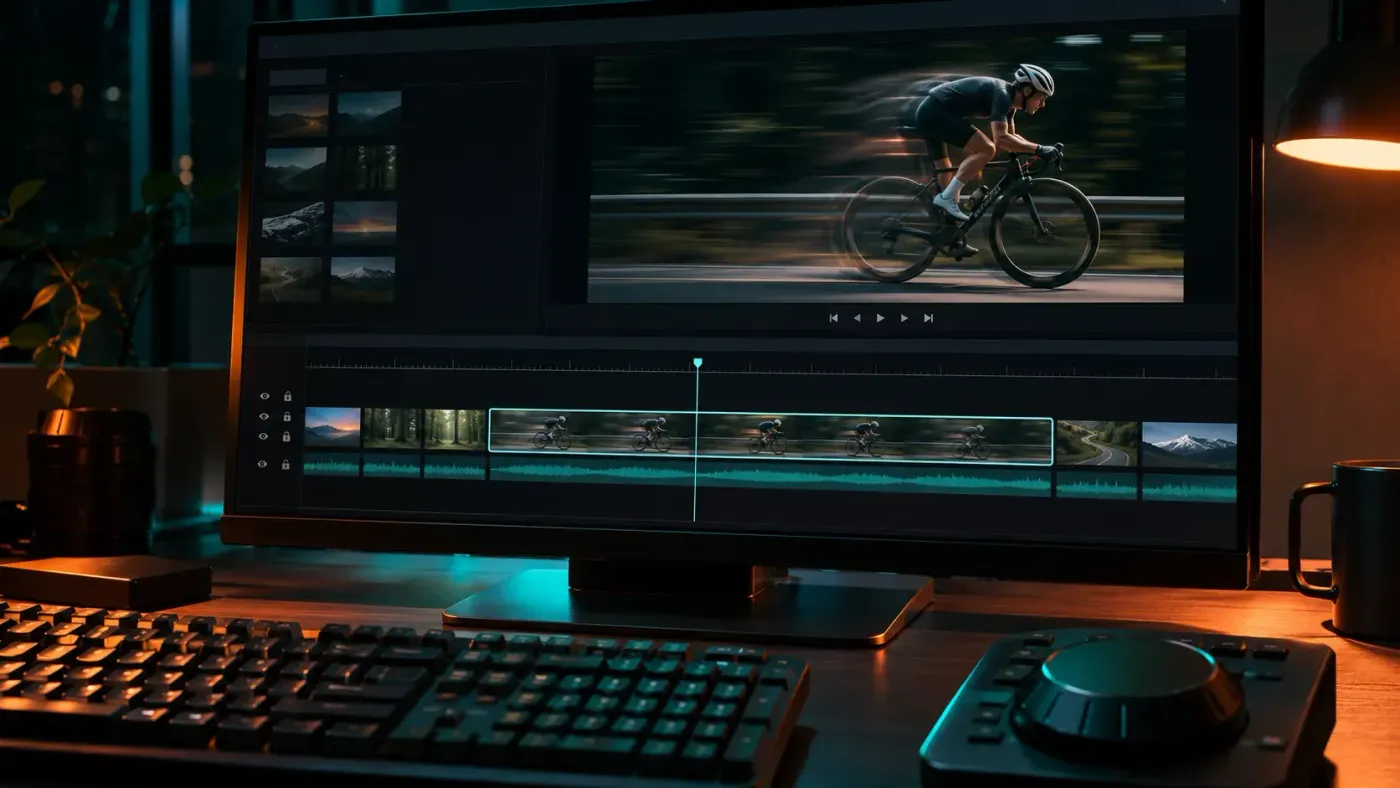
To speed up or slow down a clip in Adobe Premiere (formerly Premiere Pro), select it in the timeline and choose Clip > Speed/Duration, or press Ctrl+R on Windows or Cmd+R on a Mac. Type a Speed above 100% to make it faster or below 100% to make it slower: 200% plays a 10-second shot in 5 seconds, and 50% stretches it to 20. Before you select OK, decide whether the clips after it should move and whether the voice keeps its pitch. A slowed shot also needs a choice of how Premiere fills the extra frames.
I'd settle the speed before cutting music hits, titles or captions to the shot, because a new speed is a new length, and anything you timed to the old length has to be checked again.
What a speed change touches in the sequence
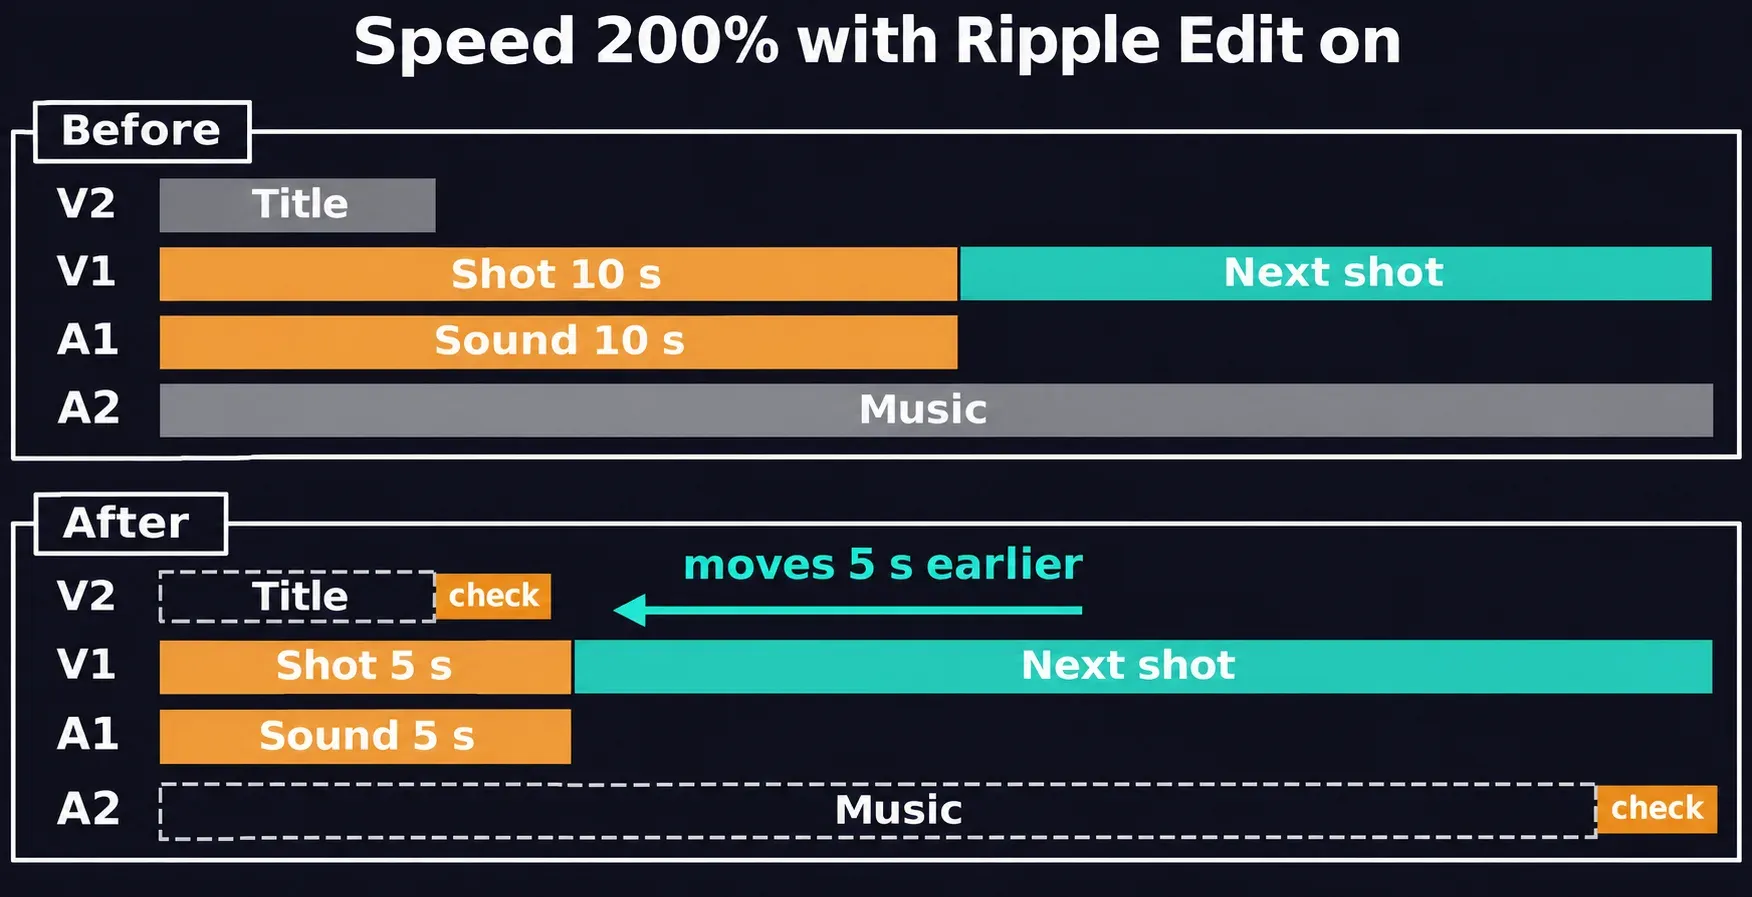
Take a simple stack, the kind most retimed shots sit in:
- V2: a title over the shot.
- V1: the shot you're retiming, followed by the next shots.
- A1: the shot's own sound, linked to its picture.
- A2: a music bed under the whole scene.
Speed/Duration changes only the clips in your selection, so include the shot's sound on A1 when it should follow the picture. The next shots on V1 move only if you choose Ripple Edit. The title and the music aren't in the selection and keep their speed, so after the change you check where each of them now falls against the shot.
Change the speed of one clip or several
The Speed/Duration command works on one clip or on several selected clips at once.
- Select one or more clips in the Timeline panel. For a single shot, make sure the selection includes the sound you want retimed with it.
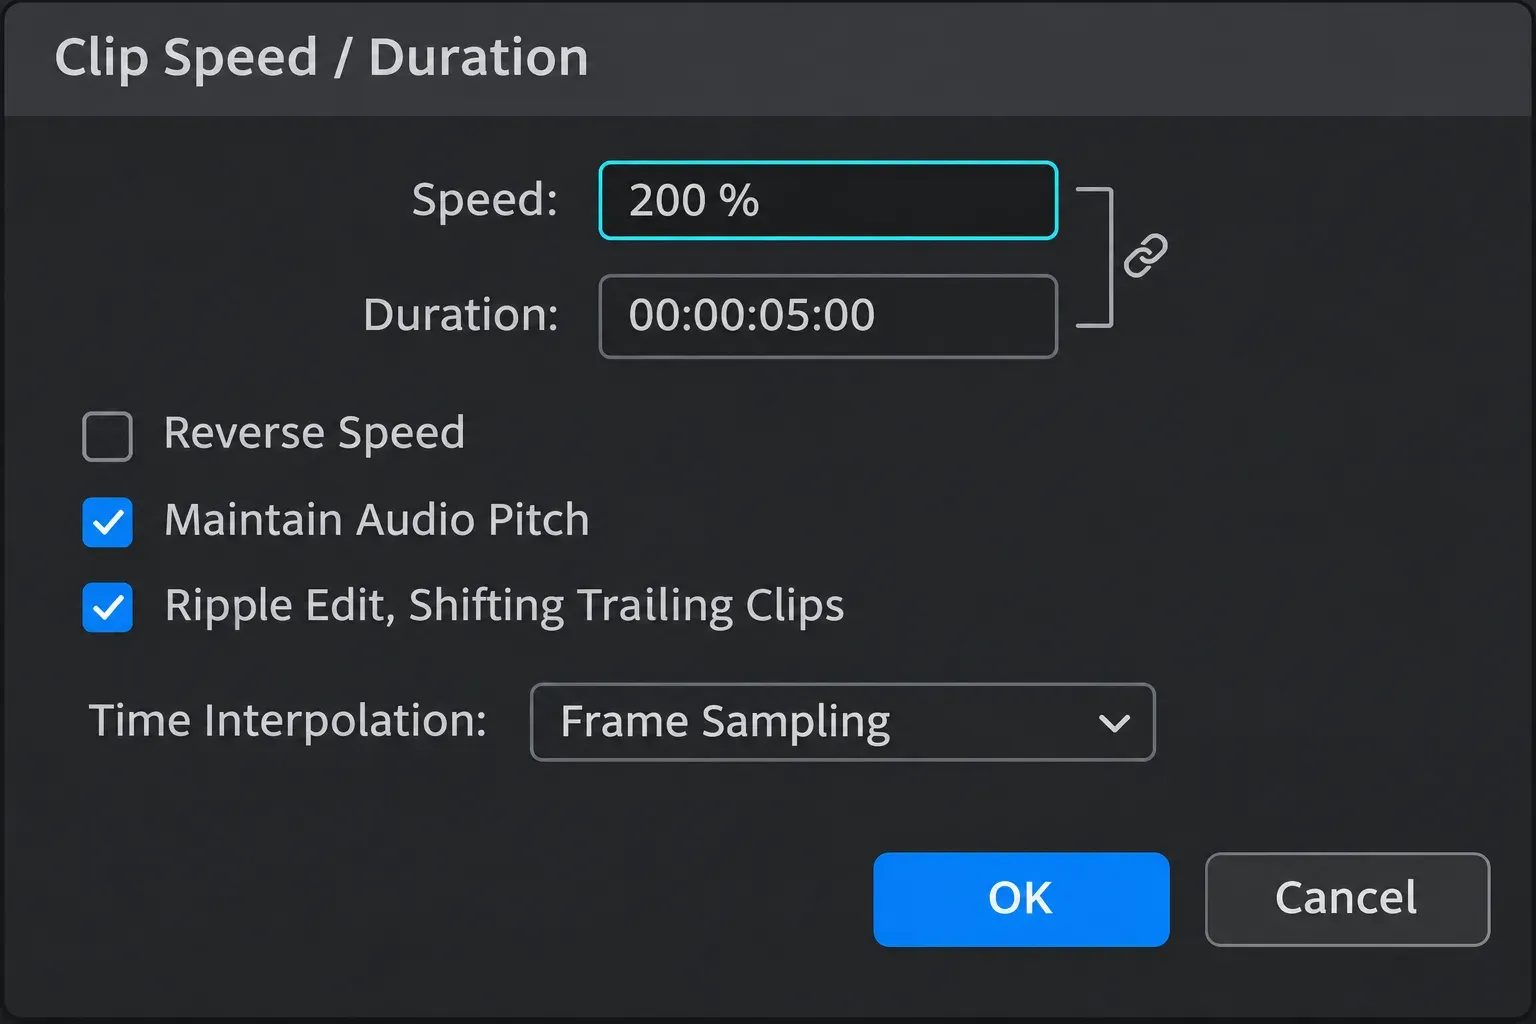
- Choose Clip > Speed/Duration, or right-click the selection and choose Speed/Duration. The default keys are Ctrl+R on Windows and Cmd+R on macOS; if you've remapped them, use the menu.
- Keep the Speed and Duration fields linked and type a percentage into Speed: 100% is normal, lower values slow the clip down and higher values speed it up.
- Set Reverse speed, Maintain audio pitch, Ripple Edit and Time Interpolation as described below, then select OK.
- Park the playhead before the shot and play through its outgoing edit in the Program Monitor. Watch the next shot arrive and listen to the sound across the cut.
Select several clips only when they need the same percentage. They'll share one speed, but each still needs its own look at the outgoing edit and, for dialogue, its own listen.
Read the percentage as a new length
With the fields linked, a faster clip takes less timeline time and a slower one takes more. These lengths are calculated for an untrimmed 10-second shot at one constant speed:
| Speed | Playback | New length |
|---|---|---|
| 25% | Quarter speed | 40 seconds |
| 50% | Half speed | 20 seconds |
| 100% | Original speed | 10 seconds |
| 200% | Twice the speed | 5 seconds |
| 400% | Four times the speed | 2.5 seconds |
The arithmetic is new length = original length × 100 ÷ speed percentage. It works the other way too: keep the fields linked and type a length into Duration when the shot has to fill an exact time, and the speed follows.
Select the link icon between the two fields so it shows a broken link only when you want to change one without the other, for example to shorten the clip without changing its speed. Turn the link back on before the next speed change.
Drag a clip to length with Rate Stretch
The Rate Stretch tool sets the speed by length instead of by number. Press R, or find Rate Stretch in the toolbar under the Ripple Edit tool, then drag the start or end edge of the clip. Drag it inward and the shot gets shorter and faster; drag it outward and it gets longer and slower.
I'd use Rate Stretch when the length is what matters, like a shot that has to end on a music hit, and Speed/Duration when the percentage matters, like several shots that should all run at 50%. Afterward, open Speed/Duration on the stretched clip to read the percentage the drag produced and to set pitch and interpolation.
Choose whether the next clips move
Select Ripple Edit in the dialog to shift the trailing clips, the ones after the shot, so the next edit follows the new length. Speed a 10-second shot up to 200% with it selected and the clips after it move 5 seconds earlier; slow the shot to 50% and they move 10 seconds later.
Leave it clear when the later timing has to stay where it is, such as a cut that lands on the music. Then play the outgoing edit and look at where the shot's new length ends against the next clip.
For a slowdown beside a clip that can't move, retime a copy of the shot in an empty stretch of the timeline first. You'll see the whole slowed length and can pick the part that goes back into the cut.
Check the rest of the stack after a ripple. Titles, captions and the music bed aren't part of the selection, so look at where each one now sits against the shots that moved, and play every cut on the music again.
Keep the voice at its own pitch
Select Maintain audio pitch to keep the sound at its original pitch while the speed changes. Leave it clear and the pitch follows the speed: higher when the clip plays faster, lower when it plays slower.
Pitch is only part of the check. Start playback before the first word and listen through the next edit: the pace, the ends of words and the music underneath. If the picture works at the new speed but the voice doesn't, I'd reduce the change or run the shot over separate sound rather than keep a voice that's hard to follow.
Pick how slow-motion frames are filled
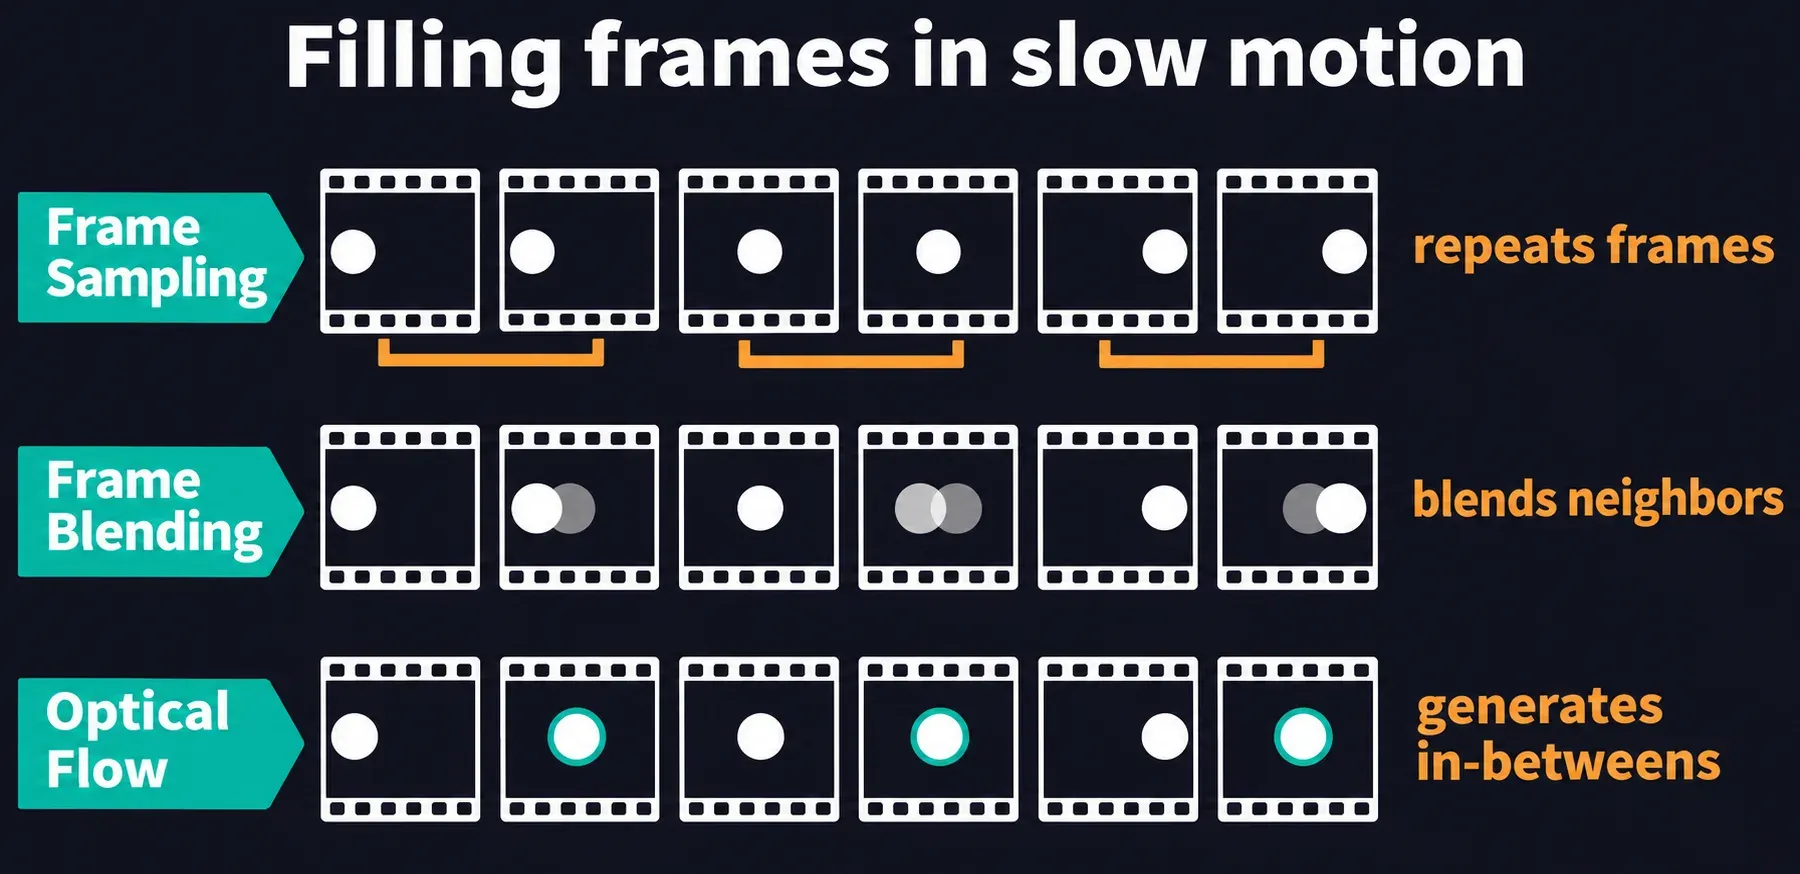
A slowed shot has fewer recorded frames than its new length needs, and Time Interpolation in the same dialog decides how Premiere fills the difference. The three time interpolation methods fill it in different ways:
- Frame Sampling repeats or removes existing frames. It's the fastest, and it suits small changes or a deliberately slightly choppy look.
- Frame Blending blends neighboring frames. It gives smoother slow motion, especially on footage without a lot of fast movement.
- Optical Flow analyzes the motion between frames and generates new ones. It gives the smoothest motion, especially for big speed changes, and works best on clear motion with defined edges.
I'd compare the slow section with Frame Sampling first, because it shows the recorded frames with nothing added. Then switch to Optical Flow and keep it only if the motion reads better at the size you'll deliver. Optical Flow can introduce artifacts where neighboring frames differ a lot; if you see them, go back to one of the other two methods.
Watch the subject where it crosses another object, enters the frame or changes direction. Set Optical Flow on the clip in the timeline, since it isn't available from the Project panel.
If playback stutters too much to judge the motion, press I at the start of the slow section and O at the end, then choose Sequence > Render Effects In to Out (Enter on both platforms). It renders the red-bar sections between the marks, and a green bar shows the part that's rendered.
Don't slow a single shot through Interpret Footage. That changes the clip's frame rate everywhere it's used in the project, sound included, while Speed/Duration changes only the instance you selected.
Play the shot backward
Select Reverse speed in the same dialog to play the clip backward at the speed you set. The action now runs the other way, so the frame that meets the outgoing edit is the one that used to open the shot. Play both edits with sound before you move on.
When one constant speed isn't the answer
If only part of a shot needs a different speed, split the clip where the change starts and retime that piece on its own. If the speed should change gradually inside the shot, build a speed ramp with keyframes; that guide also works out how slow a shot can go on its own recorded frames.
Play the retimed edit
Park the playhead a few seconds before the shot and play through its outgoing edit with sound. Check that the next shot arrives where you meant it to, the title and captions still sit over the right frames, the music hit lands, and the slow motion holds up at the size you'll deliver. Change one setting at a time and play the same stretch again.